Setup: Customers - Contacts
How to get there: Set Up | Customers | Contacts
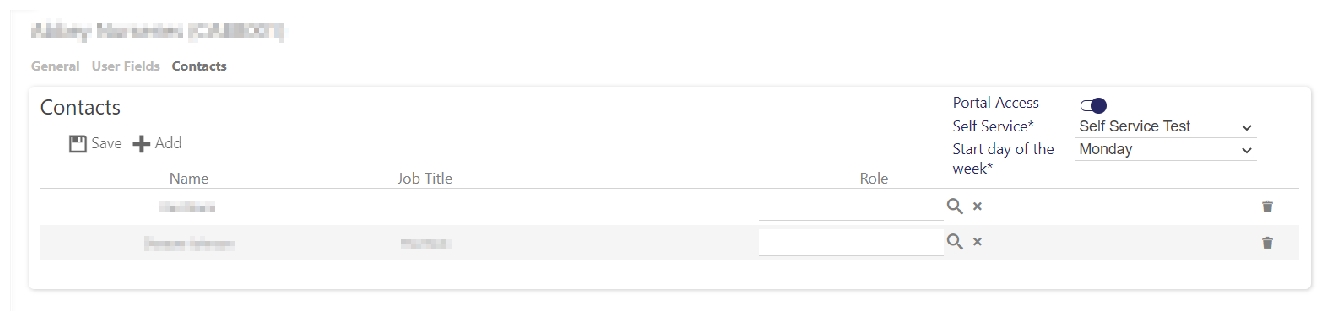
From the Set Up | Customers | Contacts tab, you are able to attach Contacts to Customers. This is a one to many relationship from a Customer perspective i.e. a Customer can have lots of Contacts. Contact Names, Job Titles, and Roles can be stored in this area of Timegate. Contacts can also be both added to and removed from the customer record using this screen.
Customer Contacts Tab Landing Page
Screen Layout and Fields
|
Name |
Name of the Contact |
|
Job Title |
Contact’s job title |
|
Role |
The contacts role, associated with the job role - select from the list when searched upon |
Screen Actions
|
Portal Access |
Note: This is not an active field. |
|
Self Service |
Note: This is not an active field. |
|
Start day of the week |
Note: This is not an active field. |
|
Save |
Select to Save the Customer record |
|
Delete customer |
Select to Delete the Customer record. Before deleting the content, the user will be presented with a screen similar to the one below detailing how many records are linked to the Customer record. To Delete, select OK to confirm, otherwise press Cancel 
|
|
Refresh |
Select to Refresh the screen and discard any unsaved changes |
|
Save |
Save a Customer’s Contact details |
|
Add |
Select to add a Contact to a Customer |
Adding a Contact to a Customer
After selecting Add the following screen is displayed:
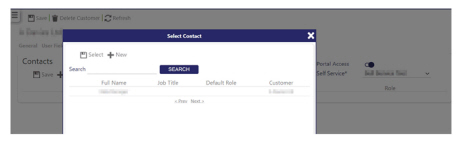
Either Select an existing Customer from the list to add (click Select once selected), or select New to create a new Contact
Creating a New Contact
Having selected New from the Select Contact screen, the New Contact screen is displayed. For further information about how to complete this screen and create a new contact, see the following section of this guide: Setup: Contacts - General