How can I schedule using the Duty Filter?
The following 1 min 55 sec clip shows you how to schedule using the duty filter:
Searching and filtering using the duty filter
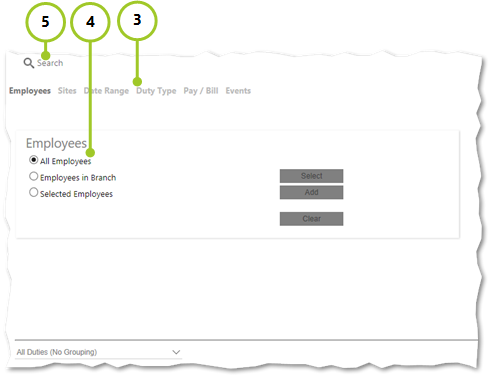
There are several different ways to search for/filter duties using the Duty Filter Wizard as shown below:
- Open either the Manage | Duties or the Plan | Duties page (not shown)
- Select New Search (not shown)
- Select how you wish to search for duties, by opening the appropriate tab, Select either Employees, Site, Date Range, Duty Types, Pay and Bill or Events
- Set up your filter using the various choices available
- Select Search
Using the duty filter view
After a search has taken place, the duty filter view is displayed onscreen as shown below:
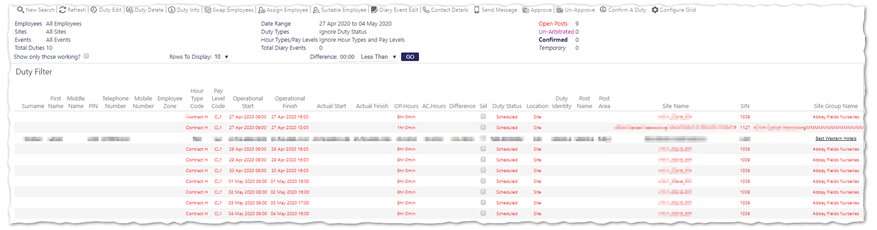
From the duty filter view, you are able to select single or multiple employees and conduct the following scheduling tasks using the toolbar:
- Find out information about a duty
- Edit a duty
- Delete a duty
- Swap employees across duties
- Assign employees
- Find suitable employees
- Edit diary events
- Approve, un-approve and confirm duties
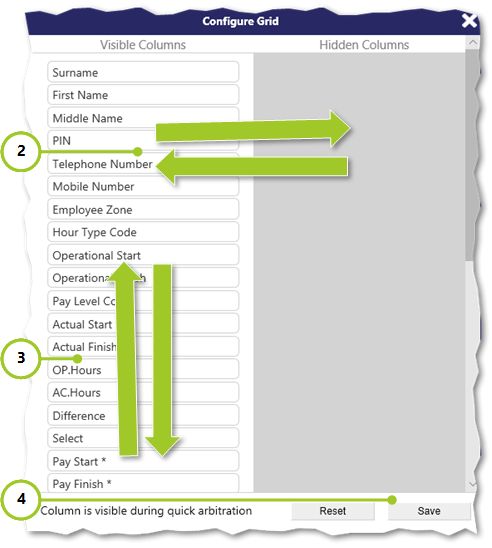
Configuring the duty filter view
The duty filter view can be customised based upon your individual wants and needs:
- From the duty filter screen’s toolbar, select Configure Grid (not shown)
- From the Configure Grid dialog box that is displayed, select which columns you want visible (drag and drop the items between the Visible Columns and Hidden Columns areas on the screen)
- Reorder the items in the way you wish to show them on the screen (drag and drop up and down in the Visible Columns area of he screen)
- Select Save to update the view