How can I do scheduling in the Branch view?
The following 0 min 32 sec clip shows you an overview of the branch view:
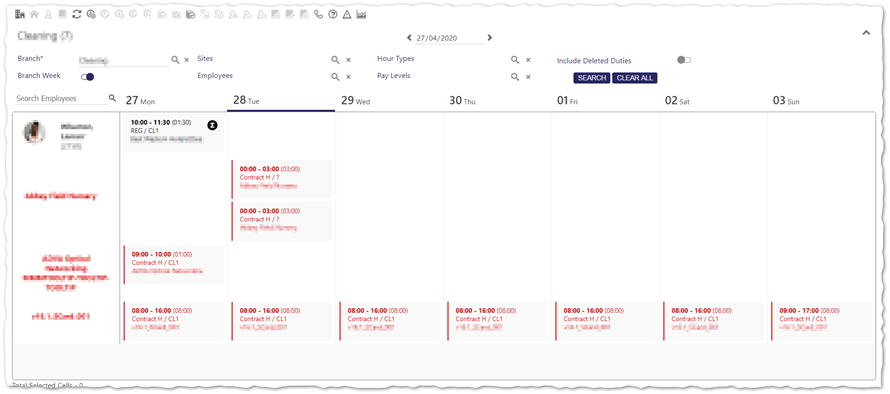
Branch view
Scheduling in the branch view is consistent with the other parts of Timegate. Select Plan | Branches from the main menu to open up the branch view. Now, select the branch/sites/employees/hour types/pay levels that you wish to view using the pop up dialog boxes accessed by selecting (magnifying glass). Once selected, select Search. The Branch view will be shown:
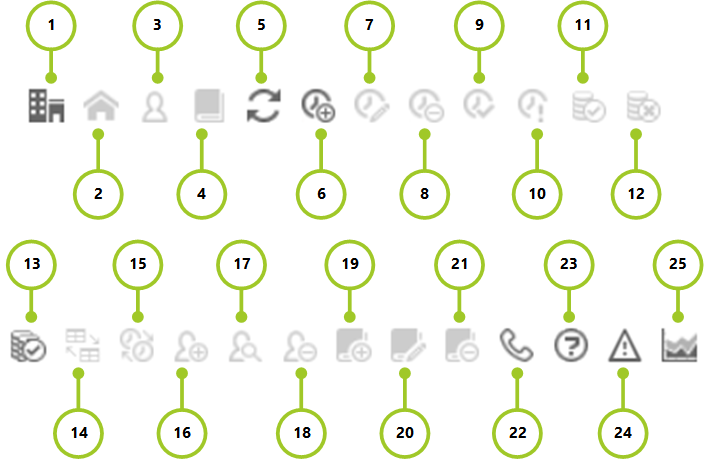
Context sensitive quick access toolbar
The following are the various buttons on the context sensitive quick access toolbar - these will be explained in more detail to you as you work through this section of the guide:
|
1 |
Go to branch |
9 |
Confirm duty |
17 |
Find suitable employee |
|
2 |
Go to site |
10 |
Temporary duty (not available in Quick Start) |
18 |
Remove employee |
|
3 |
Employee details |
11 |
Approve duty |
19 |
Add diary entry |
|
4 |
Customer details |
12 |
Unapprove duty |
20 |
Edit diary event |
|
5 |
Site group |
13 |
Bulk duty approve |
21 |
Delete diary event |
|
6 |
Site |
14 |
Make contracted |
22 |
Contact details |
|
7 |
Refresh view |
15 |
Swap employees |
23 |
Legend |
|
8 |
Add duty wizard |
16 |
Assign employee |
24 |
Raise an incident |
|
|
|
|
|
25 |
Go to histogram |
Legend
The following legend, accessed by selecting![]() from the quick access toolbar explains the schedule components:
from the quick access toolbar explains the schedule components:

Right-hand mouse click menu
When a duty/blank time slot is selected with the right-hand mouse button, within branch view a context sensitive duty menu is launched. This will vary based on the actions available for that duty/time slot. An example of such a menu is shown from where various scheduling functions are accessible:
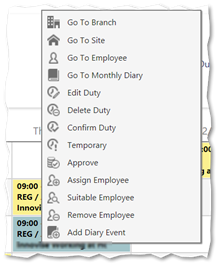
Note: In some versions of Timegate the “Temporary” choice will not be provided in the menu