How can I configuring the Area/Post/Slot headings?
From within the Select Slots settings page, accessed by selecting Configure Slots on the toolbar, the user can rename the area, post and slot heading into something that is more suitable for their business as shown:
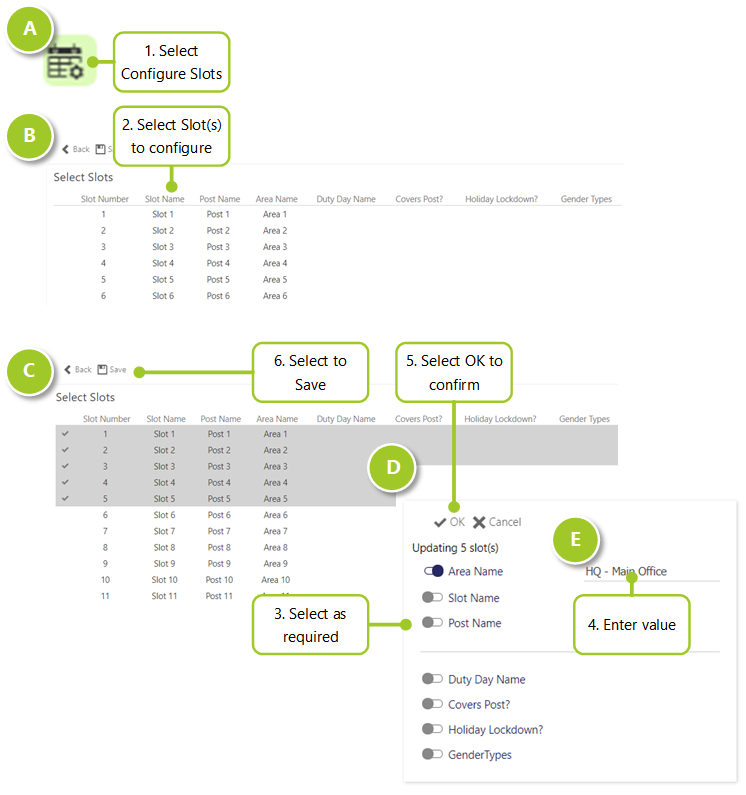
- Select Configure Slots
- Select the slot(s) that require configuration. Select one or more slots using the left-hand mouse button
- Select the various values that you wish to update.
- Enter the values as required. The Area Name, Slot Name and Post Name can be updated separately (depending upon how the user wishes to model their areas/slots/posts), for example, they may have 5 slots in the same Area, spread across two Posts, with different labels and settings for each Slot.
The user may wish to enter values for/enable the following cell options too. By default they are are all disabled:- Duty Day Name - Select the Duty Day Type from the selection available through the pop up dialog box
- Covers Post? - Select to display the Covers Post? flag
- Holiday Lockdown? - Select to display the Holiday Lockdown? flag
- Gender Types - Select the Gender Type for the slot from the selection available through the pop up dialog box. This ensures that only people of the selected gender are able to fill the slot
- Select OK to update your changes. The user should repeat tasks 2 through 5 until the structure meets with their business need
- Save the settings for the site by selecting Save