How do I set up a Site Group?
The following 1 min 21 sec clip shows you how to set up a Site Group:
After Site Groups are enabled, a new Set Up | Site Groups menu item will be available. Select Set Up | Site Groups to open the page. Follow the steps on the next page to set up a Site Group:
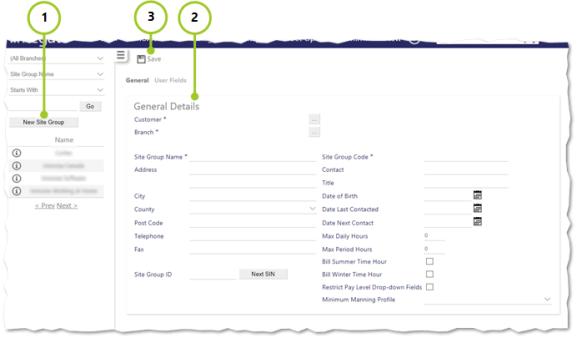
- Select New Site Group
- Enter General Details. Mandatory fields are shown with a *. The following benefit from further explanation:
- Customer - select from the pop-up window opened using [...]
- Branch - select from the pop-up window opened using [...]
- Site Group Name - clear description of the Site Group being set up
- Site Group ID - select Next Sin to automatically generate a unique identifier
- Site Group Code - unique way of identifying the Site Group
- Contact - name of contact on site
- Title - job title of the contact on site
- Date of Birth - date of birth of the contract. To set, select from calendar or enter in dd/mm/yyyy format
- Date Last Contacted - this will be blank when setting up, but will in the future be set to the date that the contact at the Site Group was last contacted. To set, select from calendar or enter in dd/mm/yyyy format
- Date Next Contact - this is the date when the Site Group will be contacted next. To set a future date, select from calendar or enter in dd/mm/yyyy format
- Max Daily Hours - maximum number of hours that can be worked, in any one day, by any Employee, on any Site within the Site Group, before a warning message is generated in Scheduling
- Max Period Hours - maximum number of hours that can be worked in any one week by any Employee, on any Site within the Site Group, before a warning message is generated in Scheduling
- Bill Summer Time Hour - select check box if the customer is billed for the hour that is not worked when an employee works a duty spanning the start of Summer Time
- Bill Winter Time Hour - select check box if customer is going to be billed for the extra hour that is worked when an employee works a duty spanning the start of Winter Time. It should be selected to bill the hour that is worked
- Restrict Pay Level Drop-down Fields - select check box to Restrict the pay level drop-down fields available to users - the only pay levels the user can see are ones that have a rate entered against them, against the Site Group post pay screen. This stops users applying pay levels to duties that do not pay a rate
- Minimum Manning Profile - drop-down list box that enables the Minimum Manning Profile to be assigned to the Site Group
- Select Save (Once saved, there are several more tabs in addition to General and User Fields)