How do I assign Users to instances?
To change or configure a user’s details from within the FM Cloud:
- Select User Management
- Select the name of the user that you wish to assign Timegate instances to. This will open the User Settings.
- Select the Timegatetab. The following screen will be displayed:
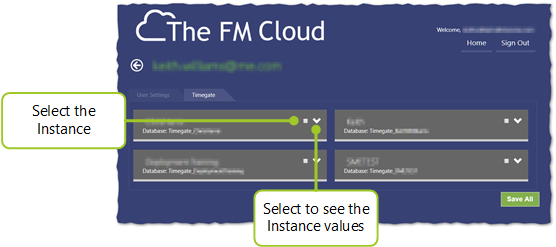
- Select the Timegate instance(s) that you wish to give the user access to
- Select the down arrow (as necessary) to show the Instance access details. The screen will expand as shown:
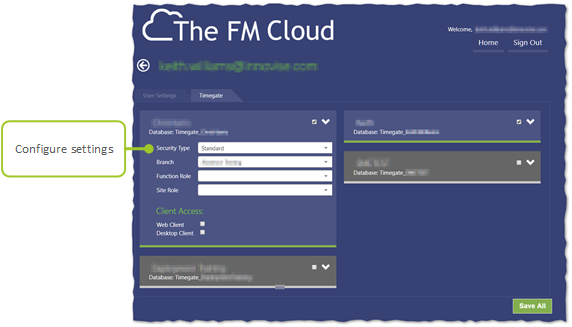
- Configure the users settings as required, selecting from the drop down lists:
- Security Type - select Standard (the Contract User type is no longer valid and should not be selected)
- Branch - select which branch the user will have access to. You can only select one branch from this screen. Further branches and multiple function roles can be added from the Web Client’s Admin Security menu. By default, you can only add one branch and one functional role
- Function Role - select the Function Role for the user
- Site Role - select the Site Role for the user, if this has been configured. These allow a lower level of security access i.e. at a site, rather than branch level
- Select Web Client to give access to the Timegate instance. If you wish to provide the user with access to other Timegate instances, repeat Steps 4 through 7 until all instances are configured
- Select Save All. A confirmation message will be shown, suggesting users may need to log out and back in for changes to take effect.