How do I set up Engagement Help Desk Tasks?
Follow these steps to set up an Engagement Help Desk Task.
-
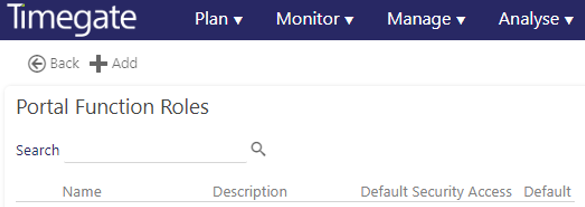
Select Admin | Engagement| Function Role to open the Portal Function Roles screen:
-
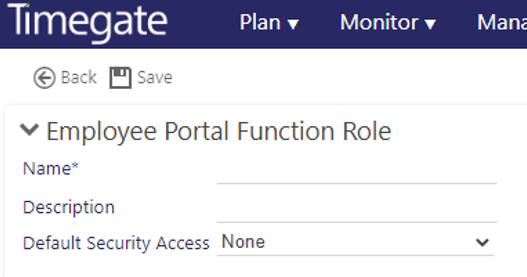
The first time you set up an Engagement Help Desk Task, it will be necessary to add a new Employee Portal Function Role. To do this, select Add. the following screen opens:
-
Enter a Name e.g. Employee Portal User
-
Enter a Descriptione.g. Employee Portal User - Full Access
-
Select the Default Security Access e.g. Full (from None, Allow and Full)
-
Once completed, select Save
Select Admin | Engagement| Function Role to open the Portal Function Roles screen: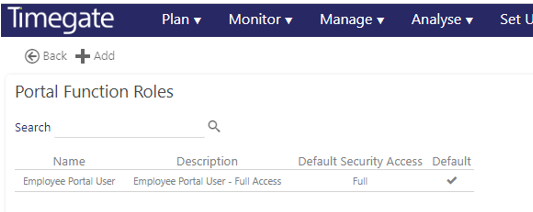
Select your Portal Function Role e.g. Employee Portal User
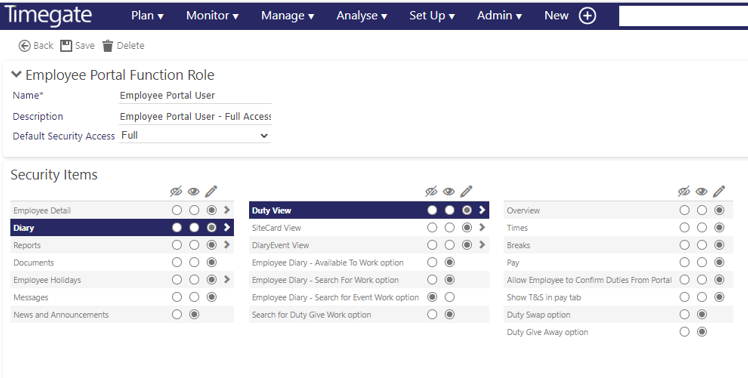
In the Employee Portal Function Role screen, you will see several icons:
-
 expands the selection and gives you more options
 -
 removes visibility of the chosen option from the Employee Portal
 -
 gives visibility of the chosen option in the Employee Portal
 -
 allows the user to edit the chosen option in the Employee Portal
In the Security items, use icon to navigate to the various item(s) you wish to set the level of security for. Once the you can the item, select the appropriate level of security, be that visible, invisible or editable.
After setting up the Employee Portal Function Roles, you now need to set up which Task Types. To do this:
-
Open Admin | Engagement | Help Desk Task Types:
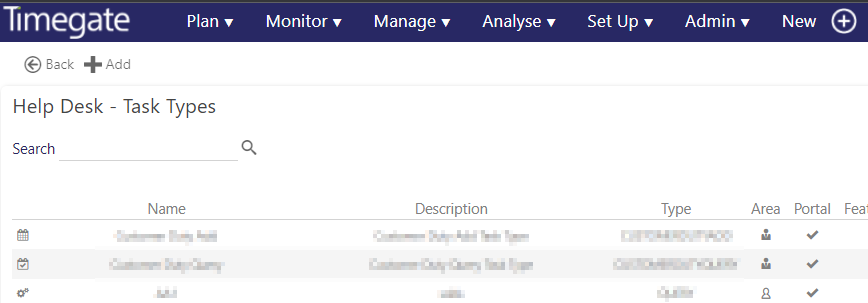
You can see the list of Help Desk - Task Types:-
The first column is the Employee Portal icon
-
Name
-
Description,
-
Type
-
Area
-
Portal- if active in the Employee Portal
-
Featured - if set as a separate Icon, additional to the pre-sets)
-
-
Select Add
-
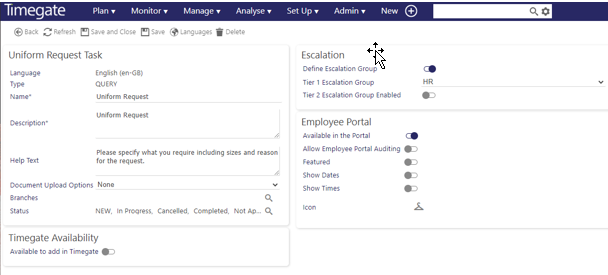
From the dialog box, select the New Task Type you wish to create. the task will show. In this example, it is a Uniform Request Task:
-
Complete the task details by entering a Name, Description, optional Help Text, the Branches that can access Duty Swaps, the Statuses (work-flow) and any escalation group(s) as required. You can also set the language and may have an option to change the icon
-
Once completed, select either Save or Save and Close