Set up: Users (FM Cloud)
For those customers that have Timegate hosted on the FM Cloud, user are set up from outside Timegate within the FM Cloud. This section of the guide explains how this is done.
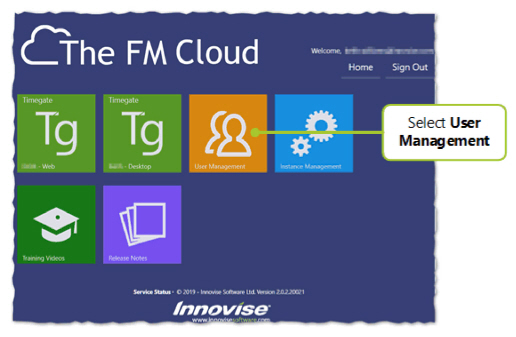
Launch the FM Cloud, to see a screen similar to the one below, with a variety of tiles installed upon it.
Select the User Management tile:
The FM Cloud User Management screen will be displayed:
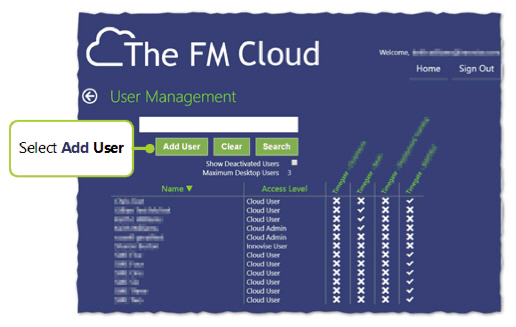
Within this page, a summary of the various system users, along with their access levels to one or more instances of Timegate databases.
Select Add User to create your new user. The following screen is loaded:
-
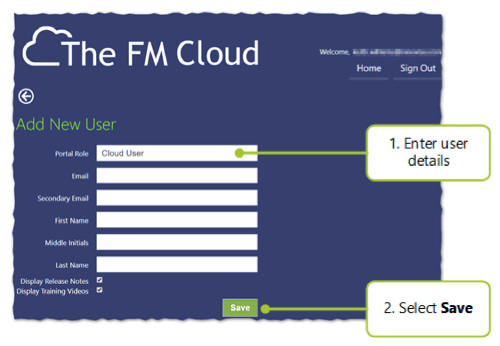
Add New User - enter the following details:
-
Portal Role - select either Cloud User or Administrator. A Cloud user will be able to log onto Timegate as a user using the Web Client. A User configured as a Cloud Admin will have access to the administrative functions of their company’s Timegate system enabling them to manage instances and users.
-
Email - a valid unique e-mail address is required. Without this, the user will not receive their password to access the system
-
Secondary Email - this is a back up email address in case the other one doesn’t work correctly
-
First Name, Middle Initials and Last Name - self explanatory
-
Display Release Notes - this controls whether the user sees a tile that enables them to access Release Notes. Select to display an FM Cloud tile for Release Notes
-
Display Training Videos - this controls whether the user sees a tile that enables them to access Training Videos. Select to display an FM Cloud tile for Training Videos. be aware that these videos are for an older version of Timegate, so the interface may be slightly different. The basic concepts are the same. We are presently in the process of updating out videos for the Web Client
-
-
Select Save. You will be returned to the User Management screen. You will see the name of the user that you have created. They will not be assigned to any Timegate instances. The next step is to assign them to one or more of these. Follow the steps in the answer to the question below to assign the Instance(s)
Assigning a User to Timegate instances
To change or configure a user’s details from within the FM Cloud:
-
Select the User Management tile
-
Select the name of the user. This will open the User Settings.
-
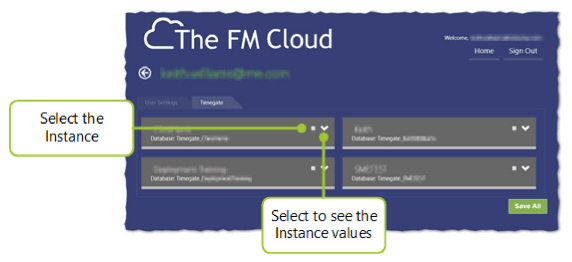
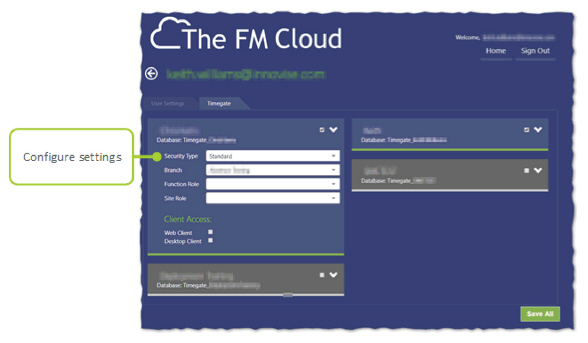
Select the Timegate tab. The following screen will be displayed:
-
Select the Timegate instance(s) that the user requires access to
-
Select the down arrow (as necessary) to show the Instance access details. The screen will expand as shown:
-
Configure the users settings as required, selecting from the drop down lists:
-
Security Type - select Standard (the Contract User type is no longer valid and should not be selected)
-
Branch - select which branch the user will have access to. Only one branch can be selected from this screen. Further branches and multiple function roles can be added from the Web Client’s Admin Security menu. By default, you can only add one branch and one functional role
-
Function Role - select the Function Role for the user
-
Site Role - select the Site Role for the user, if this has been configured. These allow a lower level of security access i.e. at a site, rather than branch level
-
-
Select Web Client to give access to the Timegate instance
-
To provide the user with access to other Timegate instances, repeat Steps 4 through 7 until all instances are configured
-
Select Save All. A confirmation message will be shown, suggesting users may need to log out and back in for changes to take effect.
Configuring/Changing a User’s details in the FM Cloud
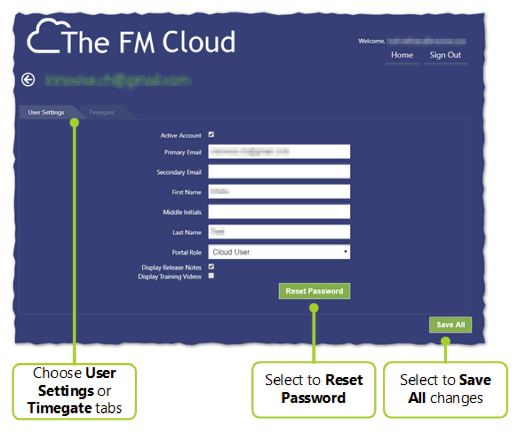
To change or configure a user’s details from within the FM Cloud, select the User Management tile. Now select the name of the user whose details you wish to edit. This will open the User Settings page as shown:
-
Edit your setting. Select:
-
User Settings tab (where you can change user details, including whether to make their account active/inactive, or reset the user’s password as shown)
-
Timegate tab (where the Timegate instance can be configured including Branch, Functional Role and Site Role as explained previously)
-
-
Select Save All to save any changes to either of the tabs. A confirmation message will be shown, suggesting users may need to log out and back in for changes to take effect.