Setup: Sites - Services
How to get there: Set Up | Sites | Services
From the Site Services tab, the user can Add both Services, Tours and Audits to a site.
By adding a Service, the user is allocating a Service Profile or series of Service Profiles to the site. These Service Profiles comprise a number of Incident Types that will be displayed on the Employees App at the selected date defined within the profile.
When adding a Tour to the site, the user is taking a series of one or more Locations and combining them together. Multiple Tours can be added to a site. Additionally, Tours can be scheduled from this screen. A variety of options enable you to schedule on a monthly, weekly, daily or hourly basis with a variety of different settings to configure that ensure your scheduling meets with your business needs. Tours are available to users for their selection, when they use the Employee App Tours functionality.
When adding an Audit to a site, the user is taking a series of one or more Locations and combining them together. Multiple Audits can be added to a site. Additionally, Audits can be scheduled from this screen. A variety of options enable you to schedule on a monthly, weekly or daily basis with a variety of different settings to configure that ensure your audit scheduling meets with your business needs. Audits are available to users for their selection, when they use the Employee App Audit functionality.
For further information see:
-
Services - Setting up Service Profiles: Admin | Service | Service Profiles
-
Tours and Audits - Setting up Locations: Set Up | Sites | Locations
Note: This functionality is only available to those companies that license Service Delivery. If you would like to use this functionality, contact your TEAM Software representative for further information.
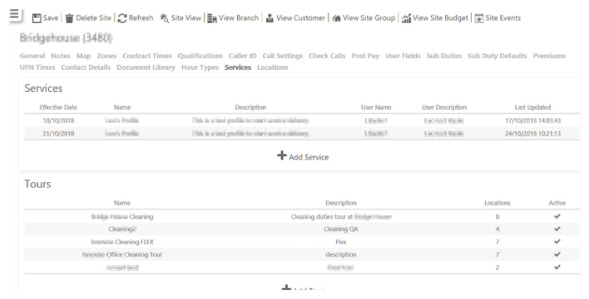
Site Services Tab
Screen Layout
The screen when loaded comprises two areas, the Services and Tours parts of the screen. These are detailed below in their own sections, after the main screen actions have been detailed.
Screen Actions
|
Save |
Select to save site changes |
|
Delete Site |
Select to delete the site from the system. A confirmation pop-up will be shown confirming the deletion which will remove all duties for the Site from the system |
|
Refresh |
Select to revert to the unsaved state |
|
Site View |
Select to open the Site View screen for the site |
|
View Branch |
Select to open the Branch screen for the site |
|
View Customer |
Select to open the Customer screen for the site |
|
View Site Group |
Select to open the Site Group screen for the site |
|
View Site Budget |
Select to open the Site Budget screen for the site |
|
Site Events |
Select to open the Events Search for the site |
Services Tab
From this part of the screen, Services are allocated to the site
Screen Layout and Fields

|
Effective Date |
Date that the particular service profile comes into effect for the site - there can be multiple profiles with multiple effective dates |
|
Name |
Name of the service profile |
|
Description |
Description of the service profile |
|
User Name |
Name of user who has assigned the service profile to the site |
|
User Description |
Description of the assignee (user) |
|
Date Last Updated |
Date that the profile was last updated |
Screen Actions
|
Add Service |
Select Add Service to add a Service Profile to the site. See Adding a Service Profile to a |
Adding a Service Profile to a Site
Having created a service profile (See Admin | Service | Service Profile) select Add Service to add it to the Site. The following screen will be displayed:
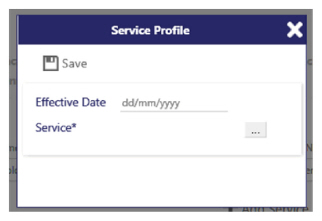
Enter an Effective Date (in DD/MM/YYYY) format that the service profile will come into effect
Select the Service (select [...]) to load the following screen:
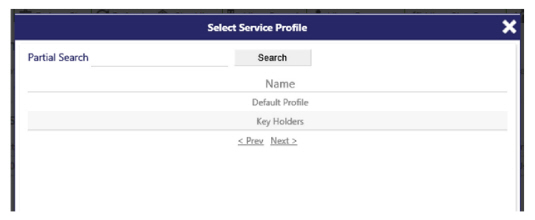
Select the profile Name from the list. Use < Prev and Next> to navigate as necessary. Alternatively enter a keyword and select Search to find the profile if it is not on the displayed screen.
Once selected, the screen returns to the previous screen.
Select Save. The profile has now been added to the site
Note: When allocating Services Profiles to a Site, A Service Profile can be linked to many sites at the same time, but a Site can only have a maximum of one "active" Service Profile against a site at any time. You can add multiple different Service Profiles to a Site that will come into effect on dates in the future, however, when the new Service Profile comes into effect, it replaces the incumbent, and does not run in parallel with it as it is not possible to have more than one Service Profile associated to a Site.
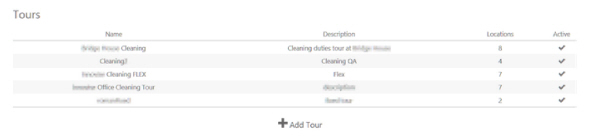
Tours Tab
From this part of the screen, Tours are created/edited for the site, using sequenced combinations of the previously defined locations that have been created in the Set Up | Location.
Screen Layout and Fields
|
Name |
Name of the tour |
|
Description |
Description of the tour |
|
Locations |
Number of locations within the tour |
|
Active |
When selected (indicated by a tick), the tour will be active. Tours are only visible to employees when they are active. |
Screen Actions
|
+ Add Tour |
Select + Add Tour to add a tour to the site. See Adding a Tour to a Site for more information |
|
Tour |
Select an existing tour to see its contents in full on a new screen. From the screen, the user can also edit and save changes to the tour |
Adding a Tour to Site
Having created a series of locations (See Sites | Location) select +Add Tour to create a tour and make it available to the Site. The tour screen comprises five sections - Tour Details, Scheduling, Alerting, Location List and Tour Locations (as illustrated in the Screen Layout and Fields sections below)
To create the tour and add it to the site, the user:
-
Enters the Tour Details including whether they wish to set up a schedule and alerting
-
As required, enters the Scheduling information (to schedule at a monthly, weekly, daily or hourly level)
-
As required, enters any alerting information such as the target audience for the alerts along with the message that is to be sent
-
Drags and drops the desired, available locations from the Location List onto the Tour Locations list
-
Tour Locations are then sequences as required (again this is drag-and-drop)
-
Finally, the user Saves their tour
Screen Layout and Fields
Add Tours screen
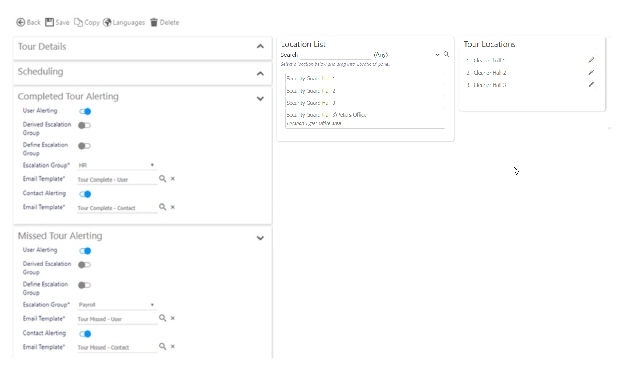
Details of each field are documented beneath the various screenshots of each section that are documented below ( note that the Tour Details and Scheduling details from above have been expanded out for the screenshots below.
Tour Details
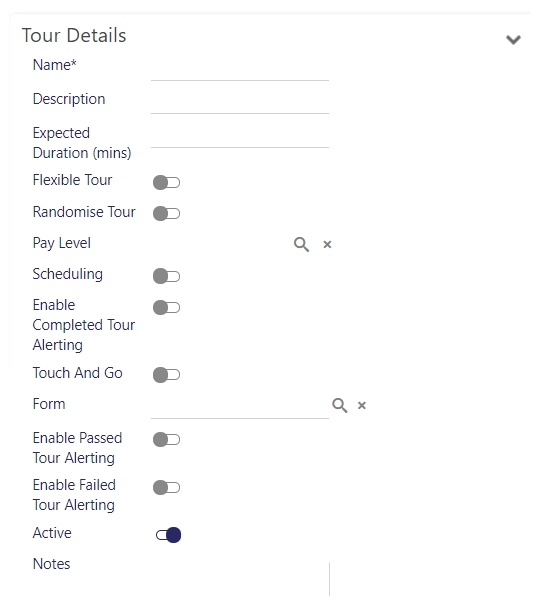
|
Name |
Mandatory - Name of the tour |
|
Description |
Description of the tour |
|
Expected Duration (mins) |
Anticipated number of minutes to complete the tour |
|
Flexible Tour |
Tours can be flexible or sequential, in that users will have to complete them in any order (flexible), or the order shown in the Tour Locations part of the screen (sequential) |
|
Randomise Tour |
Select to make a tour can be randomised. Randomised tours are tours that Timegate automatically randomises the order of the locations for. The employee should complete in the order presented to them. This is a great safety feature - the employee will complete the same tour on a nightly basis, but in a random order, not an order of their choice (as per flexible tours) or sequential (as in the same predefined order everyday). |
|
Pay Level |
Use this option to select the Pay Level that you wish to attach to the tour (if any). Select to be presented with the following window: 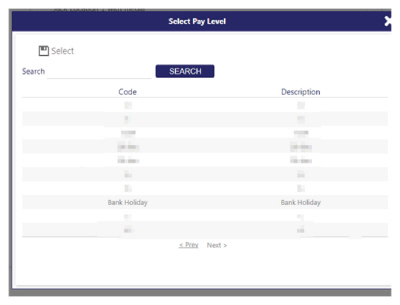
Select the Pay Level you wish to attach. Only people with the given Pay Level will be able to see the tour. If no Pay Level has been selected, everyone will be able to see the tour regardless of their Pay Level. |
|
Scheduling |
Enable scheduling for the tour on a regular basis (e.g. monthly, weekly, daily, hourly) - opens a new panel at the bottom of the screen to complete |
|
Enable Missed Tour Alerting |
Select to Enable Missed Tour Alerting. As required, enter any Missed Tour Alerting information such as the target audience for the alerts along with message. See below for more information about the various options available when this is selected. |
|
Enable Completed Tour Alerting |
Select to Enable Completed Tour Alerting. Enter any Completed Alerting information such as the target audience for the alerts along with message. See below for more information about the various options available when this is selected. |
|
Touch and Go |
Select to enable Touch and Go functionality upon the tour. This option caters for more basic and rapid NFC tag scanning. When selected, a successful adhoc NFC tag scan will result in the respective tagged location being flagged as completed, without the user being navigated to as per standard structured tours. |
|
Form |
Select a Form for use on the tour. If Scorable and required, Enable Missed Tour Alerting and/or Enable Completed Tour Alerting can be enabled. Additionally, you may wish to alert for Passed and Failed tours. |
|
Enable Passed Tour Form Alerting |
Select to enable. As required, enter any Passed Form Alerting information such as the target audience (be that an escalation group or contacts) and associated message template. See below for more information about the various options available when this is selected. |
|
Enable Failed Tour Form Alerting |
Select to enable. As required enter any Failed Form Alerting information such as the target audience (be that an escalation group or contacts) and associated message template. See below for more information about the various options available when this is selected. |
|
Active |
When selected the tour will be active (default value). Tours are only visible to employees when they are active. When a user is accessing their Tours on their Android or iOS device, Tours are shown as illustrated below - initially all available, active Tours will be shown under the Not Started section of the screen: 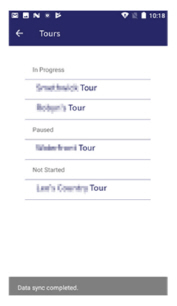
|
|
Notes |
Enter any notes for the employee to see for the given location as the tour progresses |
Scheduling
The selection that a user makes in terms of Recurrence Pattern has an impact upon the content of the Scheduling part of the screen. The screenshots for Monthly, Weekly, Daily and Hourly are shown in the sections below:
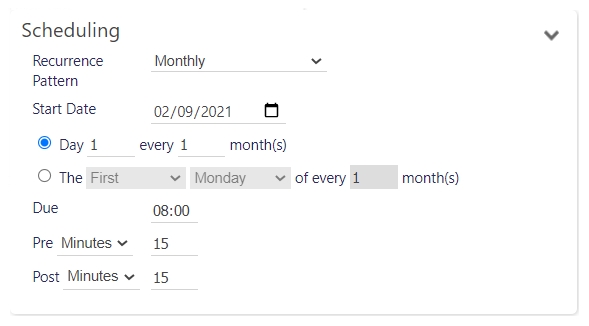
Monthly
|
Recurrence Pattern |
Select the recurrence pattern from the list of available choices:
|
|
Start Date |
Date the schedule will commence (in DD/MM/YYYY format) in this example 09/11/2018 |
|
Day ___ every ___ month(s) |
When scheduling on a monthly basis, either Day ___ every ___ month(s) or The ___ ___ of every ___ month(s) must be selected. If Day ___ every ___ month(s) is selected, a Day (1 - 31) must be entered along with the frequency of the tour in months e.g. 3 months. In the example above, if Day ___ every ___ month(s) were selected, the tour would run on the 31st of the month, every two months. note if the date is not available during the month (e.g. 30 or 31 in February) the tour will be available for employees doing the appropriate duty on the last available date of the month before the requested date. |
|
The ___ ___ of every ___ month(s) |
When scheduling on a monthly basis, either The ___ ___ of every ___ month(s) or Day ___ every ___ month(s) must be selected. If The ___ ___ of every ___ month(s) is selected, an instance (i.e. First to Fourth) and day of the week (i.e. Monday to Sunday) along with the frequency of the tour in months e.g. 3 months. In the example above, the tour will be available for employees doing the appropriate duty on the first Monday of the month, every two months starting at the next available first Monday of the month after the 09/11/2018 |
|
Due |
Time of the day in HH:MM format for the tour |
|
Pre |
Pre-time in minutes/hours/days/weeks (depending upon selection from drop-down list) before the Due time that the tour is made available to employees to see in the app when they are on an appropriate duty |
|
Post |
Post-time in minutes/hours/days/weeks (depending upon selection from drop-down list) after the Due time that the tour remains available to employees to see in the app when they are on an appropriate duty |
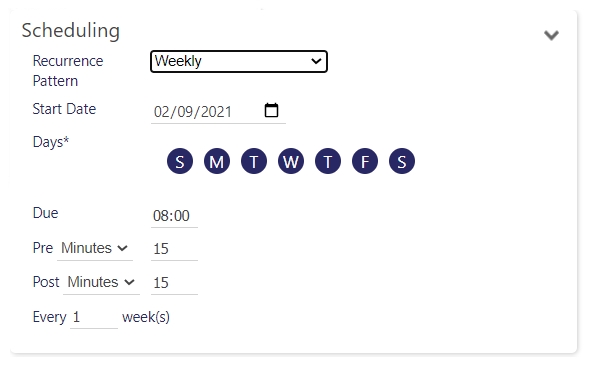
Weekly
|
Recurrence Pattern |
Select the recurrence pattern from the list of available choices:
|
|
Start Date |
Date the schedule will commence (in DD/MM/YYYY format) in this example 09/11/2018 |
|
Days |
Mandatory field - select the day(s) of the week that the tour is to be run. In this example, the tour will run every Sunday, Wednesday and Saturday |
|
Due |
Time of the day in HH:MM format for the tour |
|
Pre (Mins) |
Pre-time in minutes/hours/days/weeks (depending upon selection from drop-down list) before the Due time that the tour is made available to employees to see in the app when they are on an appropriate duty |
|
Post (Mins) |
Post-time in minutes/hours/days/weeks (depending upon selection from drop-down list) after the Due time that the tour remains available to employees to see in the app when they are on an appropriate duty |
|
Every ___ week(s) |
The pattern in terms of week, select number e.g. 1 week(s), for weekly, 2 week(s) for every two weeks |
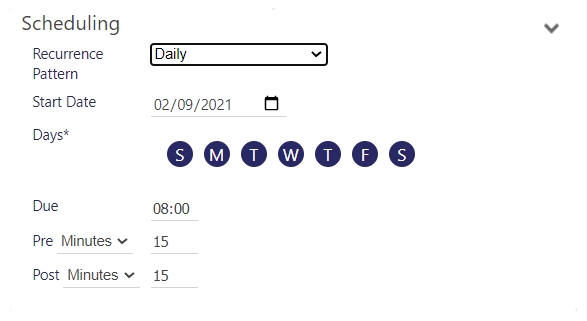
Daily
|
Recurrence Pattern |
Select the recurrence pattern from the list of available choices:
|
|
Start Date |
Date the schedule will commence (in DD/MM/YYYY format) in this example 09/11/2018 |
|
Days |
Select the days of the week to schedule the tour - select either a single day or multiple days from Sunday through Saturday |
|
Due |
Time of the day in HH:MM format for the tour |
|
Pre |
Pre-time in minutes/hours/days/weeks (depending upon selection from drop-down list) before the Due time that the tour is made available to employees to see in the app when they are on an appropriate duty |
|
Post |
Post- -time in minutes/hours/days/weeks (depending upon selection from drop-down list) after the Due time that the tour remains available to employees to see in the app when they are on an appropriate duty |
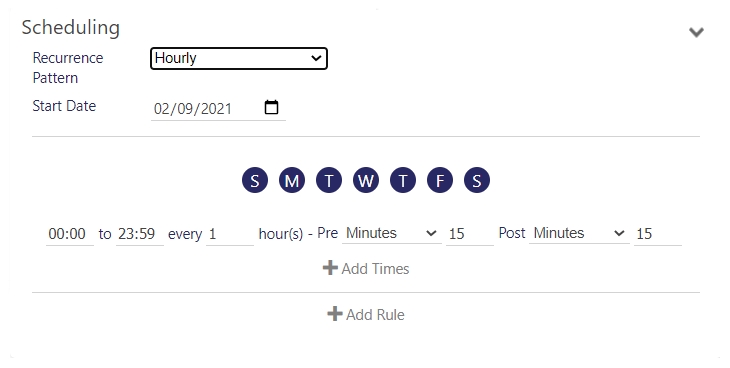
Hourly
|
Recurrence Pattern |
Select the recurrence pattern from the list of available choices:
|
|
Start Date |
Date the schedule will commence (in DD/MM/YYYY format) in this example 09/11/2018 |
|
+ Add Times |
Add an extra time to the rule. Once selected, the times can be allocated for the rules in the format of ___ to ___ every ___ hour(s). The ___ to ___ are times that are entered in a HH;MM format. The Every ___ Hour(s) dictates how regularly within the timespan a tour is run. In the example above, in the first time slot, there are two rules. The first rule is from 00:00 to 05:59. Every hour from 00:00 to 05:59, a tour will take place. The second rule is specified between 06:00 to 20:00. Therefore every 5 hours between 06:00 and 20:00. the second rule will come into affect, which will mean that a tour will run every 5 hous from that point forwards |
|
+ Add rule |
Add an extra rule, from within which times can set - the rule will comprise a selection from the days of the week In the above example, the first rule is scheduled for week days from Monday through Firday (as shown by the date indicator) The second rule is scheduled to operate at weekends - Saturday and Sunday |
|
Pre |
Pre-time in minutes/hours (depending upon selection from drop-down list) before the defined time that the tour is made available to employees to see in the app when they are on an appropriate duty |
|
Post |
Post-time in minutes/hours (depending upon selection from drop-down list) after the defined times that the tour remains available to employees to see in the app when they are on an appropriate duty |
|
+ Add Times |
Add an extra time to the rule. Once selected, the times can be allocated for the rules in the format of ___ to ___ every ___ hour(s) |
|
+ Add rule |
Add an extra rule, from within which times are set - the rule will comprise a selection from the days of the week |
|
Delete icon |
Remove the Times and Rules associated with it |
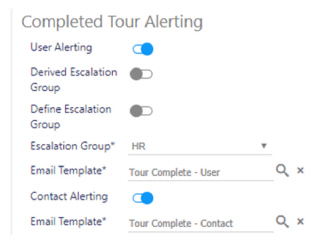
Completed Tour Alerting
|
User Alerting |
Select to enable user alerting when a tour is completed |
|
Derived |
Select to use the Derived Escalation Group i.e. the default escalation group |
|
Define |
Select to define an escalation group (using the Email Template option below) |
|
Escalation Group |
Select the Escalation Group that you wish to use (when Define Escalation Group is selected) |
|
Email Template |
Select the Email Template that you wish to use to send emails to the defined escalation group if the option has been selected, when a tour is completed. Select [...] to choose. Use Clear to remove link |
|
Contact Alerting |
Select to enable alerting to your Contacts |
|
Email Template |
Select the Email Template that you wish to use to send emails to your Contacts if the Contact Alerting option has been selected, when a tour is completed. Select [...] to choose. Use Clear to remove link |
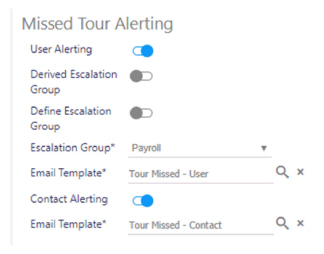
Missed Tour Alerting
|
User Alerting |
Select to enable user alerting when a tour is missed |
|
Derived |
Select to use the Derived Escalation Group i.e. the default escalation group |
|
Define |
Select to define an escalation group (using the Email Template option below) |
|
Escalation Group |
Select the Escalation Group that you wish to use (when Define Escalation Group is selected) |
|
Email Template |
Select the Email Template that you wish to use to send emails to the defined escalation group if the option has been selected, when a tour is missed. Select [...] to choose. Use Clear to remove link |
|
Contact Alerting |
Select to enable alerting to your Contacts |
|
Email Template |
Select the Email Template that you wish to use to send emails to your Contacts if the Contact Alerting option has been selected, when a tour is missed. Select [...] to choose. Use Clear to remove link |
Passed Tour Form Alerting
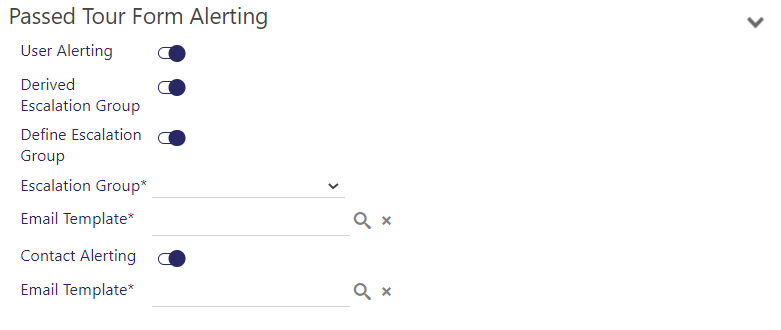
| User Alerting |
Select if you wish for users to receive a message if the tours form is passed |
| Derived Escalation Group | Select to use the Derived Escalation Group i.e. the default escalation group |
| Define Escalation Group | Select to define an Escalation Group (using the Email Template option below) |
| Escalation Group | Select the Escalation Group to alert when the tours form is passed |
| Email Template |
Select the Email Template that you wish to use to alert escalation groups with, when the tours form is passed |
| Contact Alerting | Select if you wish for contacts to receive alerts when the tours form is passed |
| Email Template | Select the Email Template that you wish to use to contacts with, when the tours form is passed |
Failed Tour Form Alerting
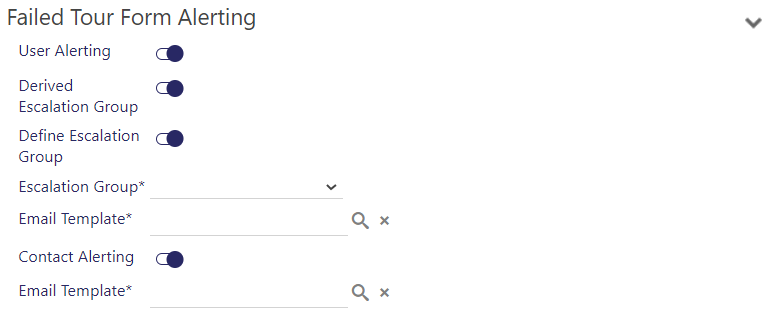
| User Alerting |
Select if you wish for users to receive failed formr alerts |
| Derived Escalation Group |
Select to use the Derived Escalation Group i.e. the default escalation group |
| Define Escalation Group |
Select to define an Escalation Group (using the Email Template option below) |
| Escalation Group |
Select the Escalation Group to alert when the tours form is failed |
| Email Template |
Select the Email Template that you wish to use to alert escalation groups with, when the tours form is failed |
| Contact Alerting |
Select if you wish for contacts to receive alerts when tours the tours form is failed |
| Email Template |
Select the Email Template that you wish to use to contacts with, when tours the tours form is failed |
Locations List

|
Location List |
Locations that have been configured. Drag and drop onto the Tours Locations to include within the tour. use the search options to locate locations as required |
Tour Locations
|
Tour Locations |
Locations that have been selected to include within the tour. They can be dragged up and down the list in order to sort the order that they are visited in to make up the tour. To remove them from the tour, drag the location back to the Location List from the Tour Locations list |
|
Pencil icon |
Select to view and edit Tour Location Details. When selected, the following will be load: 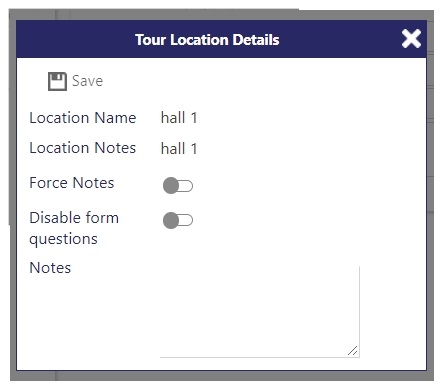
To add Notes to the site, enter them in the Notes box for this tour. These Notes can be optionally viewed or set to display on screen by default (see next bullet point) To force employees on the tour to view the Notes that have been entered, select Force Notes. Selecting this option ensures that when the user arrives at a location, the notes are automatically displayed on the screen for reading within the Timegate Employee App. If you wish to set up a tour that includes one or more locations where you want to remove the option for employees to fill a given form. whilst retaining the ability to compete it at other locations on a tour, you can do this by selecting Disable form questions for each individual location where you do not wish to show the questions from the form on the tour. Select Save |
Screen Actions
|
Back |
Select to go back to Site | Services without saving changes |
|
Save |
Select to Save the tour |
|
Copy |
Select to make a copy of the Tour. The copy will created and it’s Name changed to have “- Copy” at the end e.g. Main Site Tour would be copied as Main Site Tour - Copy. Modify the tour as needed and then select Save to create the new copy. The copy will be displayed in the Tours section of Set Up | Sites | Services |
|
Languages |
Select multi-language support options (if configured) from the drop-down menu |
|
|
Select to delete the tour. Note: The tour definition can only be deleted if it has not been used for a tour by the time of deletion. |
|
Location List |
Drag-and-drop locations from the list onto the Tour Locations part of the screen to make them part of the tour |
|
Tour Locations |
Drag-and-drop locations to resequence the order of the tour. Alternatively, drag-and-drop the location back onto the Location List to remove it from the tour |
Audit Tab
From this part of the screen, audits are created/edited for the site, using sequenced combinations of the previously defined locations that have been created in the Set Up | Location.
Screen Layout and Fields

|
Name |
Name of the audit |
|
Description |
Description of the audit |
|
Locations |
Number of locations where the audit is used |
|
Active |
When selected (indicated by a tick), the audit will be active. Audits are only visible to employees when they are active. |
Screen Actions
|
+ Add Audit |
Select + Add Audit to add a tour to the site. See Adding an Audit to a Site for more information |
|
Audit |
Select an existing audit to see its contents in full on a new screen. From the screen, the user can also edit and save changes to the audit |
Adding an Audit to a Site
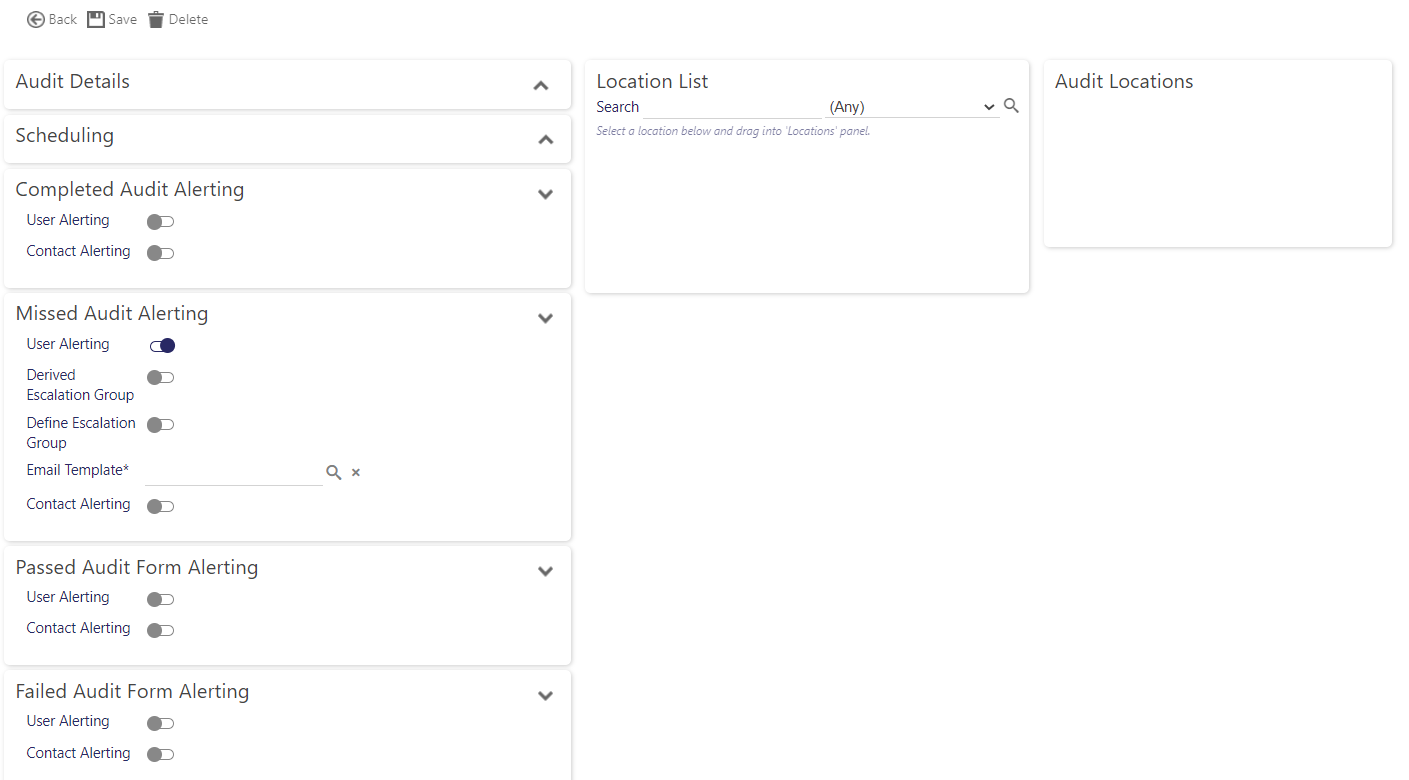
Having created a series of locations (See Sites | Location) select +Add Audit to create an audit and make it available to the Site. The Audit screen comprises five sections - Audit Details, Scheduling, Alerting, Location List and Audit Locations (as illustrated in the Screen Layout and Fields sections below)
To create the Audit and add it to the site, the user:
-
Enters the Audit Details including whether they wish to set up a schedule and alerting
-
As required, enters the Scheduling information (to schedule at a monthly, weekly, or daily level)
-
As required, enters any alerting information such as the target audience for the alerts along with the message that is to be sent
-
Drags and drops the desired, available locations from the Location List onto the Audit Locations list
-
Audit Locations are then sequences as required (again this is drag-and-drop)
-
Finally, the user saves their audit
Screen Layout and Fields
Add Audits screen
Details of each field are documented beneath the various screenshots of each section that are documented below ( note that the Audit Details and Scheduling details from above have been expanded out for the screenshots below.
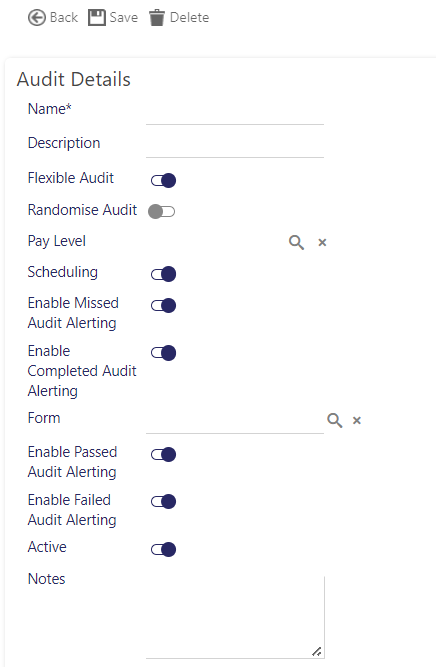
Audit Details
|
Name |
Mandatory - Name of the Audit |
|
Description |
Description of the Audit |
|
Flexible Audit |
Audits can be flexible or sequential, in that users will have to complete them in any order (flexible), or the order shown in the Audit Locations part of the screen (sequential) |
|
Randomise Audit |
Select to make an audit can be randomised. Randomised Audits are audits that Timegate automatically randomises the order of the locations for. The employee should complete in the order presented to them. This is a great safety feature - the employee will complete the same Audit on a nightly basis, but in a random order, not an order of their choice (as per flexible audits) or sequential (as in the same predefined order everyday). |
|
Pay Level |
Use this option to select the Pay Level that you wish to attach to the Audit (if any). Select to be presented with the following window:
Select the Pay Level you wish to attach. Only people with the given Pay Level will be able to see the audit. If no Pay Level has been selected, everyone will be able to see the Audit regardless of their Pay Level. |
|
Scheduling |
Enable scheduling for the Audit on a regular basis (e.g. monthly, weekly, daily, hourly) - opens a new panel at the bottom of the screen to complete |
|
Enable Missed Audit Alerting |
Select to Enable Missed Audit Alerting. As required, enter any Missed Audit Alerting information such as the target audience for the alerts along with message. See below for more information about the various options available when this is selected. |
|
Enable Completed Audit Alerting |
Select to Enable Completed Audit Alerting. Enter any Completed Alerting information such as the target audience for the alerts along with message. See below for more information about the various options available when this is selected. |
|
Form |
Select a Form for use on the Audit. If Scorable and required, Enable Missed Audit Alerting and/or Enable Completed Audit Alerting can be enabled. Additionally, you may wish to alert for Passed and Failed Audits. |
|
Enable Passed Audit Form Alerting |
Select to enable. As required, enter any Passed Form Alerting information such as the target audience (be that an escalation group or contacts) and associated message template. See below for more information about the various options available when this is selected. |
|
Enable Failed Audit Form Alerting |
Select to enable. As required enter any Failed Form Alerting information such as the target audience (be that an escalation group or contacts) and associated message template. See below for more information about the various options available when this is selected. |
|
Active |
When selected the audit will be active (default value). audits are only visible to employees when they are active |
|
Notes |
Enter any notes for the employee to see for the given location as the audit progresses |
Scheduling
The selection that a user makes in terms of Recurrence Pattern has an impact upon the content of the Scheduling part of the screen. The screenshots for Monthly, Weekly, and Daily are shown in the sections below:
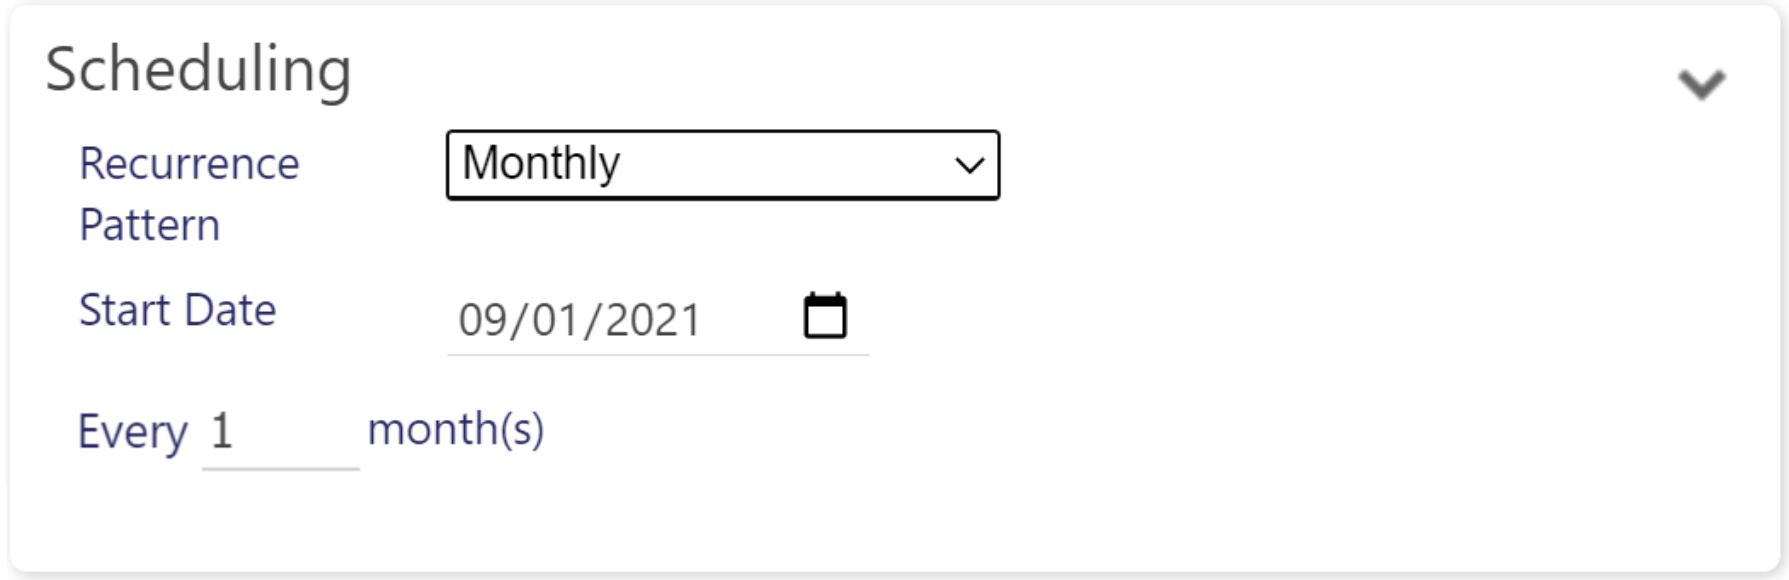
Monthly
|
Recurrence Pattern |
Select the recurrence pattern from the list of available choices:
|
|
Start Date |
Date the schedule will commence (in DD/MM/YYYY format) in this example 09/01/2021 |
|
Every ___ month(s) |
Select the interval between audits in terms of months |
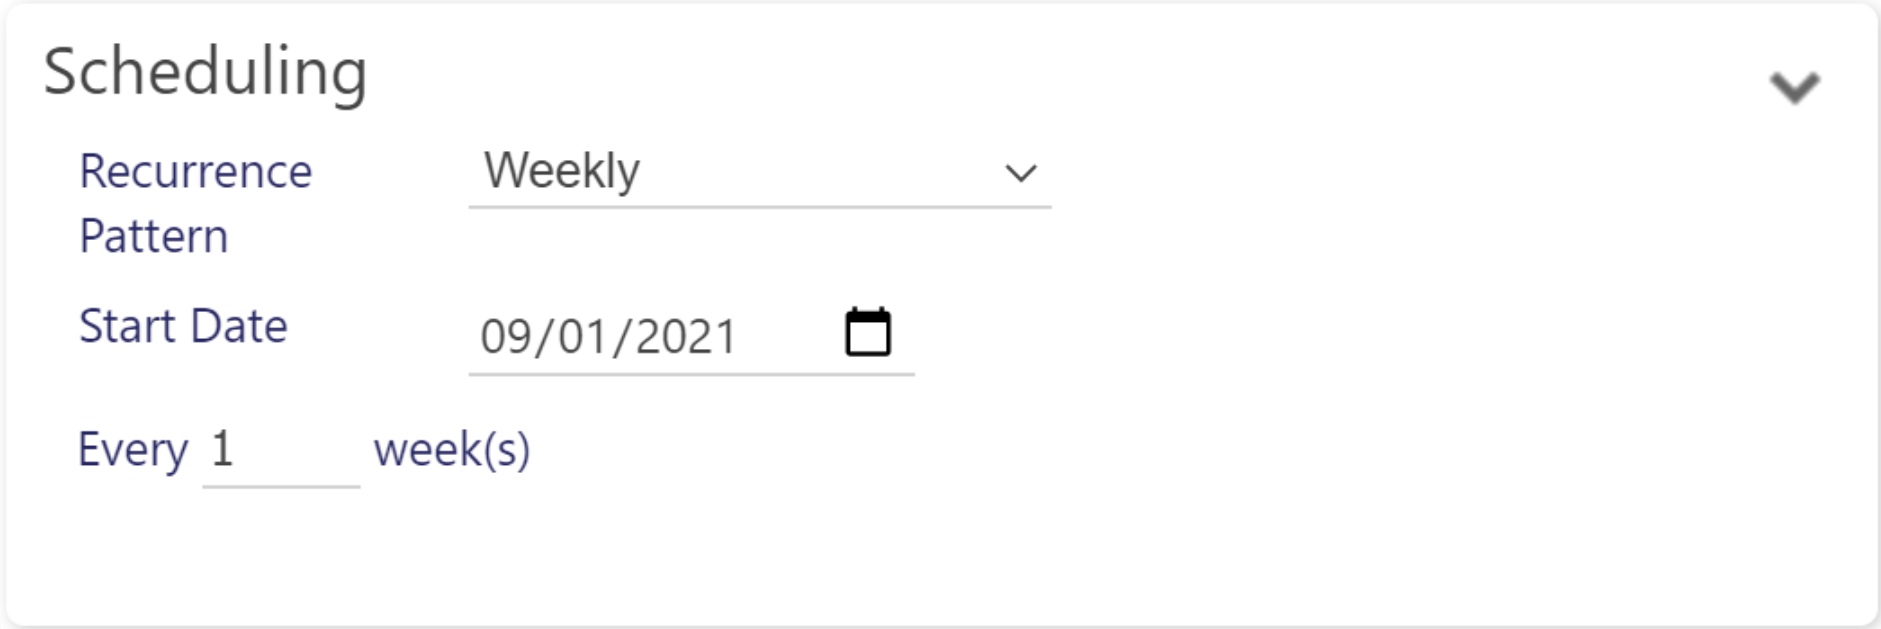
Weekly
|
Recurrence Pattern |
Select the recurrence pattern from the list of available choices:
|
|
Start Date |
Date the schedule will commence (in DD/MM/YYYY format) in this example 09/01/2021 |
|
Every ___ month(s) |
Select the interval between audits in terms of months |
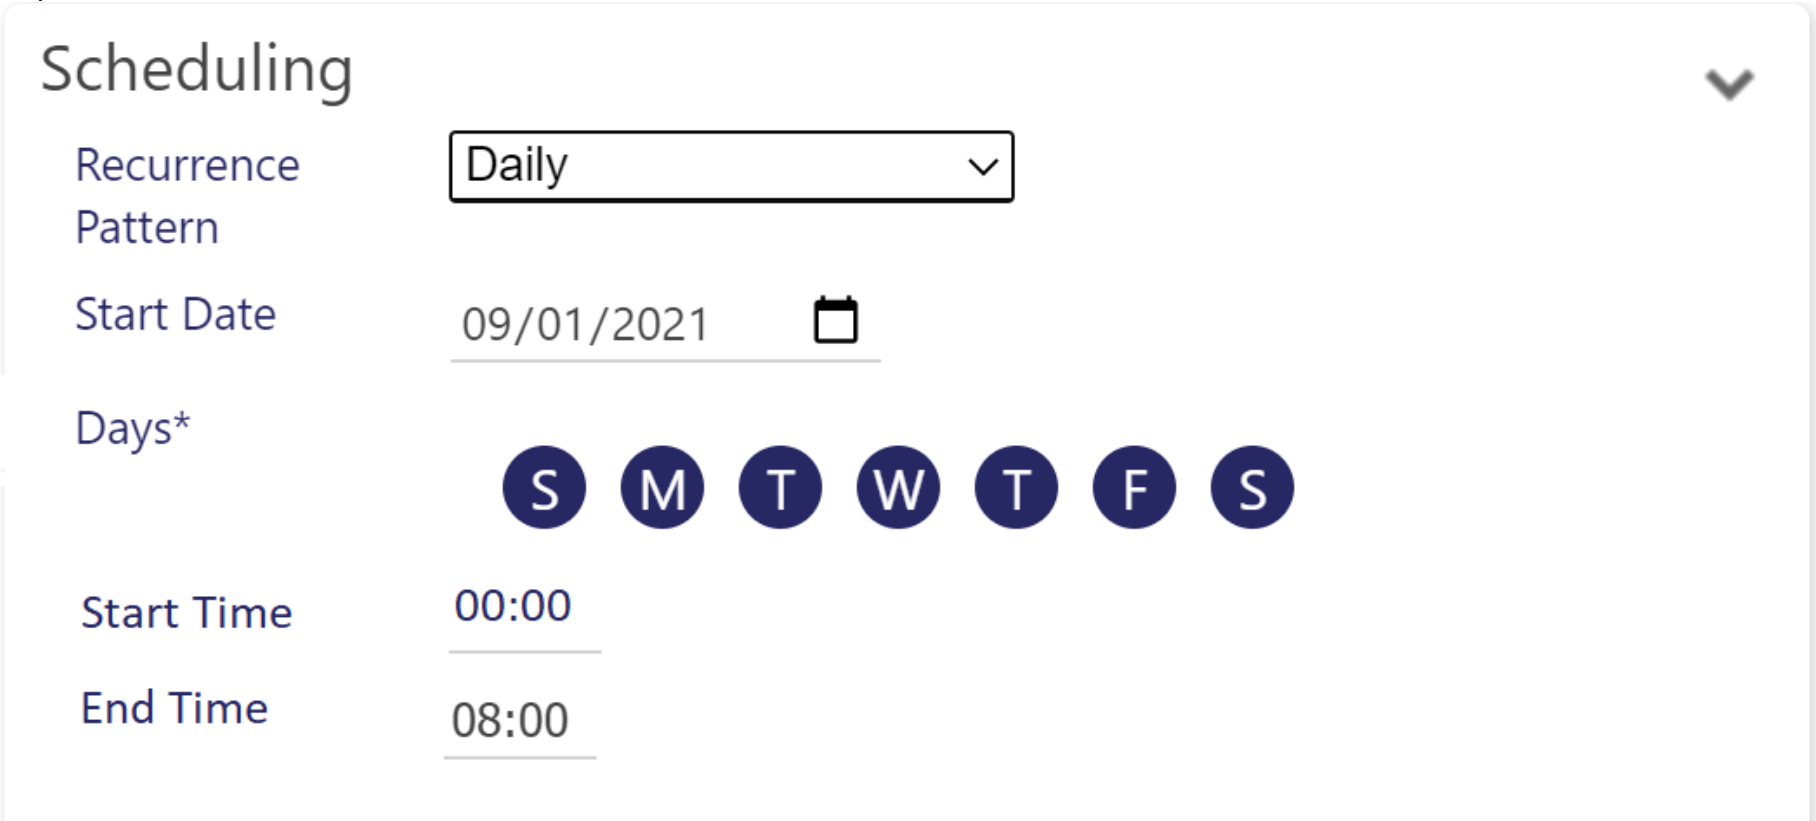
Daily
|
Recurrence Pattern |
Select the recurrence pattern from the list of available choices:
|
|
Start Date |
Date the schedule will commence (in DD/MM/YYYY format) in this example 09/01/2021 |
|
Days |
Select the days of the week to schedule the audit - select either a single day or multiple days from Sunday through Saturday |
|
Start Time |
Time of the day in HH:MM format for the audit to start |
|
End Time |
Time of the day in HH:MM format for the audit to start |
Completed Audit Alerting
|
User Alerting |
Select to enable user alerting when an audit is completed |
|
Derived |
Select to use the Derived Escalation Group i.e. the default escalation group |
|
Define |
Select to define an escalation group (using the Email Template option below) |
|
Escalation Group |
Select the Escalation Group that you wish to use (when Define Escalation Group is selected) |
|
Email Template |
Select the Email Template that you wish to use to send emails to the defined escalation group if the option has been selected, when an audit is completed. Select [...] to choose. Use Clear to remove link |
|
Contact Alerting |
Select to enable alerting to your Contacts |
|
Email Template |
Select the Email Template that you wish to use to send emails to your Contacts if the Contact Alerting option has been selected, when an audit is completed. Select [...] to choose. Use Clear to remove link |
Missed Audit Alerting
|
User Alerting |
Select to enable user alerting when an audit is missed |
|
Derived |
Select to use the Derived Escalation Group i.e. the default escalation group |
|
Define |
Select to define an escalation group (using the Email Template option below) |
|
Escalation Group |
Select the Escalation Group that you wish to use (when Define Escalation Group is selected) |
|
Email Template |
Select the Email Template that you wish to use to send emails to the defined escalation group if the option has been selected, when an audit is missed. Select [...] to choose. Use Clear to remove link |
|
Contact Alerting |
Select to enable alerting to your Contacts |
|
Email Template |
Select the Email Template that you wish to use to send emails to your Contacts if the Contact Alerting option has been selected, when an audit is missed. Select [...] to choose. Use Clear to remove link |
Passed Audit Form Alerting
| User Alerting |
Select if you wish for users to receive a message if the audits form is passed |
| Derived Escalation Group | Select to use the Derived Escalation Group i.e. the default escalation group |
| Define Escalation Group | Select to define an Escalation Group (using the Email Template option below) |
| Escalation Group | Select the Escalation Group to alert when the audits form is passed |
| Email Template |
Select the Email Template that you wish to use to alert escalation groups with, when the Audits form is passed |
| Contact Alerting | Select if you wish for contacts to receive alerts when the audits form is passed |
| Email Template | Select the Email Template that you wish to use to contacts with, when the audits form is passed |
Failed Audit Form Alerting
| User Alerting |
Select if you wish for users to receive failed formr alerts |
| Derived Escalation Group |
Select to use the Derived Escalation Group i.e. the default escalation group |
| Define Escalation Group |
Select to define an Escalation Group (using the Email Template option below) |
| Escalation Group |
Select the Escalation Group to alert when the audits form is failed |
| Email Template |
Select the Email Template that you wish to use to alert escalation groups with, when the audits form is failed |
| Contact Alerting |
Select if you wish for contacts to receive alerts when audits the audits form is failed |
| Email Template |
Select the Email Template that you wish to use to contacts with, when audits the audits form is failed |
Locations List

|
Location List |
Locations that have been configured. Drag and drop onto the Audits Locations to include within the audit. use the search options to locate locations as required |
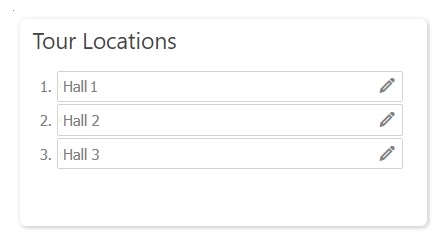
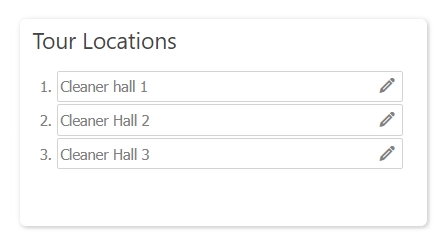
Audit Locations
|
Audit Locations |
Locations that have been selected to include within the audit. They can be dragged up and down the list in order to sort the order that they are visited in to make up the Audit. To remove them from the audit, drag the location back to the Location List from the Audit Locations list |
|
Pencil icon |
Select to view and edit Audit Location Details. When selected, the following will be load:
To add Notes to the site, enter them in the Notes box for this Audit. These Notes can be optionally viewed or set to display on screen by default (see next bullet point) To force employees on the Audit to view the Notes that have been entered, select Force Notes. Selecting this option ensures that when the user arrives at a location, the notes are automatically displayed on the screen for reading within the Timegate Employee App. If you wish to set up an audit that includes one or more locations where you want to remove the option for employees to fill a given form. whilst retaining the ability to compete it at other locations on an audit, you can do this by selecting Disable form questions for each individual location where you do not wish to show the questions from the form on the audit. Select Save |
Screen Actions
|
Back |
Select to go back to Site | Services without saving changes |
|
Save |
Select to Save the audit |
|
Copy |
Select to make a copy of the audit. The copy will created and it’s Name changed to have “- Copy” at the end e.g. Main Site Audit would be copied as Main Site Audit - Copy. Modify the audit as needed and then select Save to create the new copy. The copy will be displayed in the Audits section of Set Up | Sites | Services |
|
Languages |
Select multi-language support options (if configured) from the drop-down menu |
|
|
Select to delete the audit. Note: The audit definition can only be deleted if it has not been used for an audit by the time of deletion. |
|
Location List |
Drag-and-drop locations from the list onto the Audit Locations part of the screen to make them part of the audit |
|
Audit Locations |
Drag-and-drop locations to resequence the order of the audit. Alternatively, drag-and-drop the location back onto the Location List to remove it from the audit |