Setup: Employees - Operations
How to get there: Setup | Employees | Ops.
The use of the screen is to assign Operational specific information to the Employee. This information is used to carry out a number of Operations Checks when scheduling the Employee to work. The key areas for this are shown and detailed below.
Screen Layout and Fields
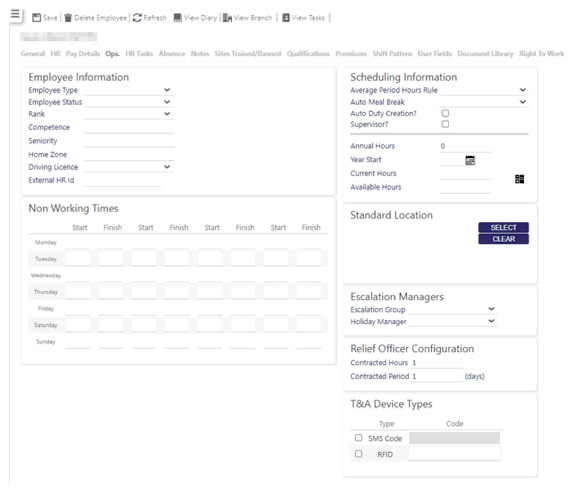
The screen is split into several sections that are all controlled by the Timegate Security Function Role assigned to the user.
Screen Actions
|
Save |
Save Employee changes |
|
Delete Employee |
Delete the Employee from the system. Note: If the Employee is a leaver, then do not Delete the Employee. Instead, set their Date Left on the HR Tab |
|
Refresh |
Revert to the unsaved state |
|
View Diary |
View Employee Monthly Diary screen |
|
View Branch |
View Branch information screen |
|
View Tasks |
Click to view Employee Help Desk Tasks screen |
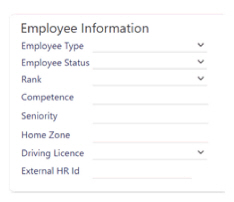
Employee Information
This section is used to hold information that will be used in the selection of Employees to work a Shift or Duty.
Screen Layout and Fields
|
Employee Type/Worker Classification |
This is used to categorise the Employee. Examples may be Core Staff, Sub Contractors, Guaranteed Hours, Cover Staff, etc. This field can be set to either mandatory or optional, depending upon your company’s individual needs. see Admin | General | Employee Settings | Employee Mandatory Fields to select whether this field is made mandatory or not. By default it is set to optional. When selected as mandatory, an * will be displayed next to it’s label on screen to show this. If a value isn’t entered, an error message will be displayed in red indicating that the field must be completed. A drop-down list of Employee Types to select your response from is available. This is list is maintained through Admin | General Settings | Employee | Employee Types/Worker Classifications. This is used in many Report Filters as well as the Find Suitable Employee search function |
|
Employee Status |
This is used to identify the status of an Employee. Examples may be: In Screening, Probation, Fully Employed, Terminated, Leaver, etc This field can be set to either mandatory or optional, depending upon your company’s individual needs. see Admin | General | Employee Settings | Employee Mandatory Fields to select whether this field is made mandatory or not. By default it is set to optional. When selected as mandatory, an * will be displayed next to it’s label on screen to show this. If a value isn’t entered, an error message will be displayed in red indicating that the field must be completed. A drop-down list of options to select your response from is available. This list is maintained through Admin | General Settings | Employee | Employee Status. This is used in many Report Filters as well as being set as a result of a Diary Event being added to an Employee. see Admin | General | General Maintenance | Diary Events for more information |
|
Rank |
This is used to assign an overarching rank to an Employee. Example may be Security, Cleaning, Grounds, Catering, etc This field can be set to either mandatory or optional, depending upon your company’s individual needs. see Admin | General | Employee Settings | Employee Mandatory Fields to select whether this field is made mandatory or not. By default it is set to optional. When selected as mandatory, an * will be displayed next to it’s label on screen to show this. If a value isn’t entered, an error message will be displayed in red indicating that the field must be completed. A drop-down list of options to select your response from is available. This is list maintained through Admin | General Settings | Employee | Ranks. This is used in many filters for Reports |
|
Competence |
This must be used carefully as it may contravene localised HR policies. It is used to rate the Employee from 1 (being the lowest) to 9 (being the highest) in terms of presentation and competence. A Site Card may be set that it requires an Employee to be a Competence of 5 or higher. A system Duty Check is available that will compare the Employee and Site and advise when an Employee does not have the correct rating |
|
Seniority |
This is used to define the Seniority Level of the Employee against their Peers. 1 is the lowest number and 999999 is the highest number that can be entered. When set, the Find Suitable Employee will order the Employees found by their Seniority starting with the lowest number (which is the highest seniority i.e. 1 is the most senior) |
|
Home Zone |
Used to geographically set up the location of the employee zone, that matches the Site Zone duty check. Can be used to categorize the employee the Employee (and a Site Zone) to indicate the area or manager that they are assigned to. As this is a free format field, an alternative solution would be to use the Employee General Tab Area Field or the Employee HR Tab Escalation Groups to store this information This is used in many report filters |
|
Driving License |
The Driving License of the Employee, normally obtained from seeing a driver’s license. Some clients tend to not use this field, but instead opt to using the Qualifications Tab on the Employee holding a Qualification Type for each class of vehicle that the Employee can drive. To choose a Driving License, select one from the drop-down list shown. 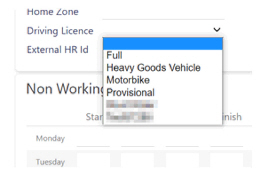
The Driving License Description will be shown in the list. Hovering over the row will highlight then click anywhere on the line to select. The Driving License selected will be shown on the screen. see Admin | General | General Maintenance | Driving License Maintenance for more information |
|
External HR Id. |
The External HR Id is the unique employee third-party system identifier e.g. in Eploy. It is used in conjunction with the optional Right to Work functionality provided in Timegate Recruit. The value in this box is used to request/re-request Right to Work information from RightCheck e.g. in the case of missing/wrong IDs. If you do not use a third-party recruitment solution, or do not use Timegate Recruit, this field should be left blank. |
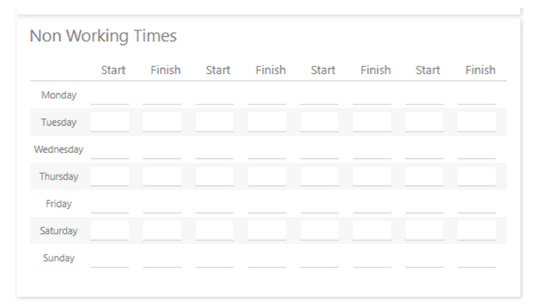
Non Working Times
This section is used to tell the system when the Employee is not available for work. This may be due to the Employee having a second job or has decided not to work on certain days of the week.
Four combinations of Start and Finish Times are allowed on each day of the week.
A Duty Check is available that will warn if an Employee is being assigned to a Duty where they are not normally available for work.
see Admin | System | Duty Checks for more information.
Screen Layout and Fields
|
Start |
Start time that the Employee is not available on the Day to the left |
|
Finish |
Finish time that the Employee is not available on the Day to the left |
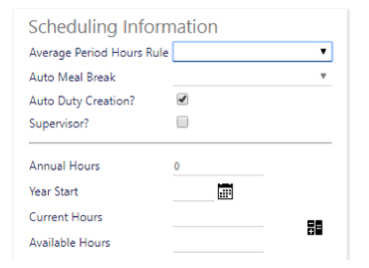
Scheduling Information
This section is used to monitor the hours that an Employee can work as well as automatic Meal Break Deductions and Auto Duty Creation.
Screen Layout and Fields
|
Average Period Hours Rule |
Select the average period hours rule from the drop down list. see Admin | General | Employee Settings | Average Period Hours Rule, Admin | System | Duty Checks and Set Up | Branches | General for more information. |
|
Auto Meal Break |
Where an Employee may work a variety of duties per day, the amount of Meal Break time deducted may also vary. Selecting a Meal Break Profile will ensure that the correct amount of time is deducted for the Employee. see the Desktop Client Maintenance | General Settings | Meal Breaks for more information. note, this deduction is only carried out on the Pay/Bill phase of the duty and therefore the meal break will not be reflected in the Site Teams Budget figures until the Duty is Arbitrated and Rate Generated |
|
Auto Duty Creation? |
Select if the Employee is allowed to work on a Site where a Duty does not currently exist for them. When the Employee Books On to a Site, and the Site has an Auto Duty Creation Profile assigned to them, a Duty is Created for the Employee with the Start Time set to the Book On Time and the remaining information set from the profile assigned to the site. see Admin | General | Auto Duty Creation Profiles for more information |
|
Supervisor? |
Select if the Employee requires Supervisor functionality on the T&A Biometric Devices. This in only available where devices have a custom configuration |
|
Annual Hours |
This is the number of hours that the Employee is contracted to work per year. Used in conjunction with the Year Start, the Current Hours and Available Hours can be calculated and displayed onscreen 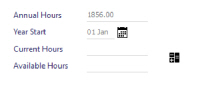
|
|
Year Start |
The Day and Month that the Annualised Year Starts |
|
Current Hours |
Calculated field on pressing the Calculator Icon. All changes should be saved before pressing the icon. Will show the number of hours that the Employee has either worked, or scheduled to for in the selected year 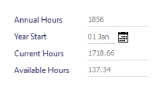
|
|
Available Hours |
Calculated field by subtracting the Current Hours from the Annual Hours Report 04-05-33 Employee Site Annualised Hours is available to report on all Employees |
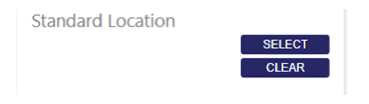
Standard Location
This section is used to define the Standard Site that the Employee is contracted to work on.
A Duty Check is available when assigning an Employee to a Duty, either manually or Rota Loaded. Additionally, it will warn if the Employee is working on a different Site.
see Admin | System | Duty Checks for more information.
Additionally, the Standard Location will allow the Employee to be used by those Users that have a Site Role that includes the Site selected within it.
see Admin | System | Site Role for more information.
Screen Layout and Fields
|
Select |
Pressing the button will allow you to select a Standard Location and the Site Name and Address will be shown on the screen for information purposes |
|
Clear |
Pressing the button will remove the Standard Location from the Employee |
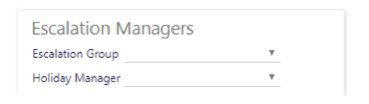
Escalation Managers
This section is used to define which Groups of Users will manage the Help Desk Tasks that are created for the Employee.
There are two groups:
-
Holiday Manager - This is the Escalation Group that can authorise only a Holiday Request for the Employee
-
Escalation Group - This is the Escalation Group that can authorise all other Help Desk Tasks
These are only used where the Help Desk Task Type does not have a Defined Escalation Group assigned to it.

If the Employee does not have a Group assigned, the Help Desk Task Fall-back Escalation Group will be used.
see Admin | General | Escalation Groups and Admin | Engagement | Help Desk Task Types for more information.
Screen Layout and Fields
|
Escalation Group |
This is where the escalation group is selected that can authorise all Help Desk Tasks |
|
Holiday Manager |
This is where the escalation group is selected that can authorise specifically only a Holiday Request for the employee |
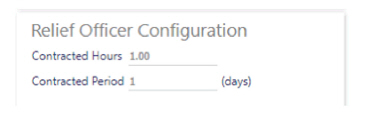
Relief Officer Configuration
This section is used to set the number of hours that a Relief Employee has been promised or guaranteed.
Within the Find Suitable Employee option, the user can select Contracted Hours to show the current available Hours for the Employee.
Where the hours are shown as negative, the Employee has worked in excess of their Relief Hours therefore another Employee should be used for fair distribution of work.
Screen Layout and Fields
|
Contracted Hours |
Number of hours that the Employee is contracted to work per week |
|
Contracted Period (Days) |
Number of Days covered by the Contracted Hours |
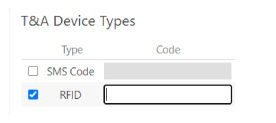
T&A Devices Types
|
SMS Code |
Currently under development - values cannot be entered into this space |
|
RFID |
Select to use RFID tags. Then enter the Code of the RFID tag associated with the employee if using RFID tags to book on/off Timegate |