Setup: Employees - HR Tasks
How to get there: Set Up | Employees | HR Tasks Tab
The HR Tasks Tab is used to store personal documents that are not widely available through the Employee Documents tab.
A Help Desk Task Type can be added to the Employee where the Task is a HR Task Type. These are generally setup as HR Information, Payroll Information, etc.
You must be a member of the escalation group to the employee to view/edit the HR Tasks tab. A warning will be displayed if you are not a member.
See Admin | Engagement | Help Desk Task Types for more information.
The key area for this are shown and detailed below:
Screen Layout and Fields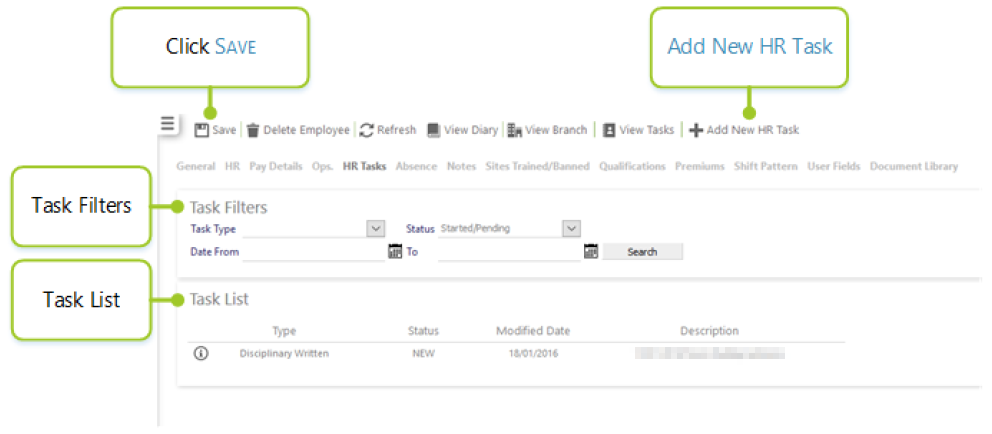
The screen is split into several sections that are all controlled by the system Security Function Role assigned to the user. These sections are detailed within this document.
Screen Actions
|
Save |
Save Employee changes |
|
Delete Employee |
Delete the Employee from the system. Note: If the Employee is a leaver, then do not delete the Employee. Instead, set their Date Left on the HR Tab to their date of leaving |
|
Refresh |
Revert to the unsaved state |
|
View Diary |
View Employee Monthly Diary screen |
|
View Branch |
View Branch information screen |
|
View Tasks |
View Employee Help Desk Tasks screen |
Task Filters
This section is used to refined the HR Tasks that are shown on the the screen
Screen Layout and Fields
| Task Type | Select a Task Type from the drop-down list to show only those tasks types |
| Status | Select a Status from the drop-down list. A Task Type must be selected for the available Status
from the task to be shown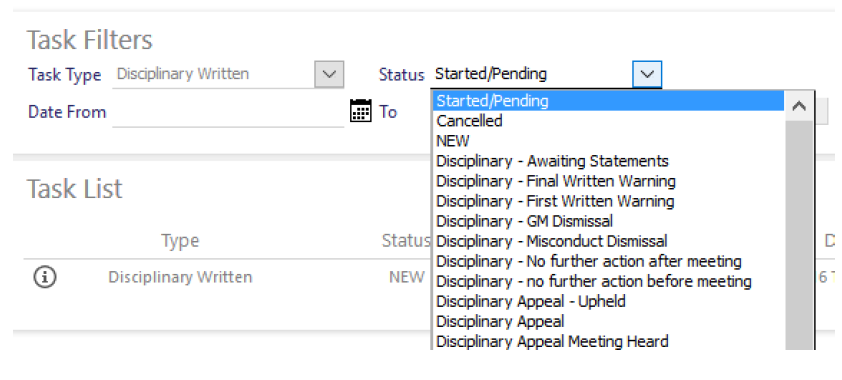 |
| Date From | Task create from date |
| Date To | Task created to date |
| Search | When pressed will show the results in the Task List section below |
Task List
This section will show the results from the Task Filters searched with.
Screen Layout and Fields
| Type | Help Desk Task Type Description |
| Status | Current status of the task |
| Modified Date | Date the task was last modified |
| Description | Description entered when creating the task |
Add New HR Task
When + is selected, you are presented with a screen to enter the Task Information into.
Screen Layout and Fields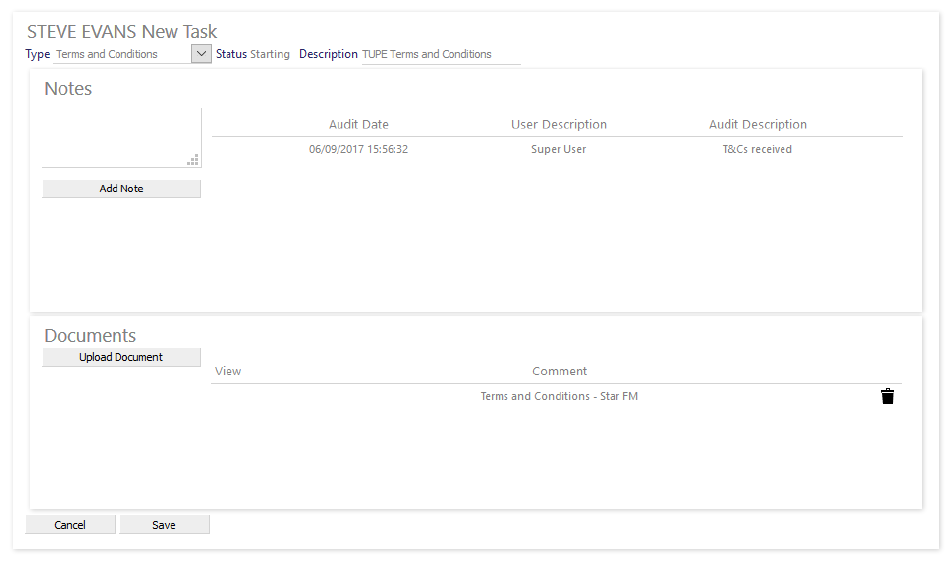
| Type | Select the Task Type required from the drop-down list. Only HR Task Types will be shown and only those where the user is a member of the Task Type Escalation Group. This is to ensure that the users can only create tasks that they are authorised to |
| Status | Defaulted to Starting and cannot be changed |
| Description | A summary description of the task being created. This will be shown in the Task List section |
| Add Note | A free format note can be added to the task. When Add Note is selected, the note will be shown in the Audit Section with a Date, Time and User stamp. Audit notes cannot be removed once added |
| Upload Document | Documents may be uploaded to the Task by selecting Upload Document. see the Upload Document section below |
| Cancel | Select to cancel the task |
| Save | Select to save the task |
Upload Document
When Upload Document is selected, a screen is displayed that enables you to select the file and assign a note to it.
Screen Layout and Fields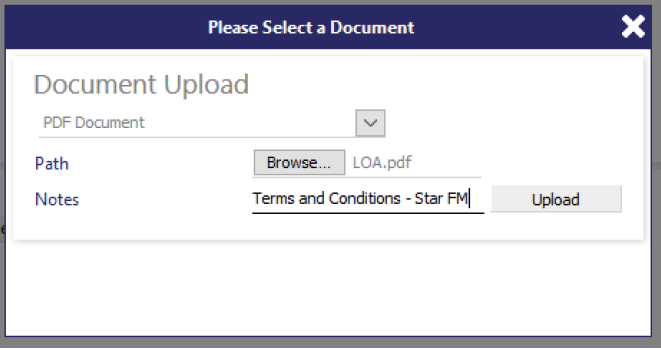
| Document type | Select the document type from the drop-down. Available options are: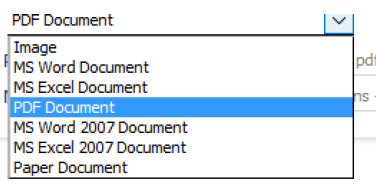 |
| Path | Select Browse to choose the file you wish to upload. Only one file can be selected at a time. |
| Notes | Enter a note to explain the content of the file |
| Upload | Select to upload the document to the task |
Reviewing and updating an HR task
A task can be edited by clicking the information icon to the left of the Task in the Task List screen.
The task will be shown where it can be reviewed and updated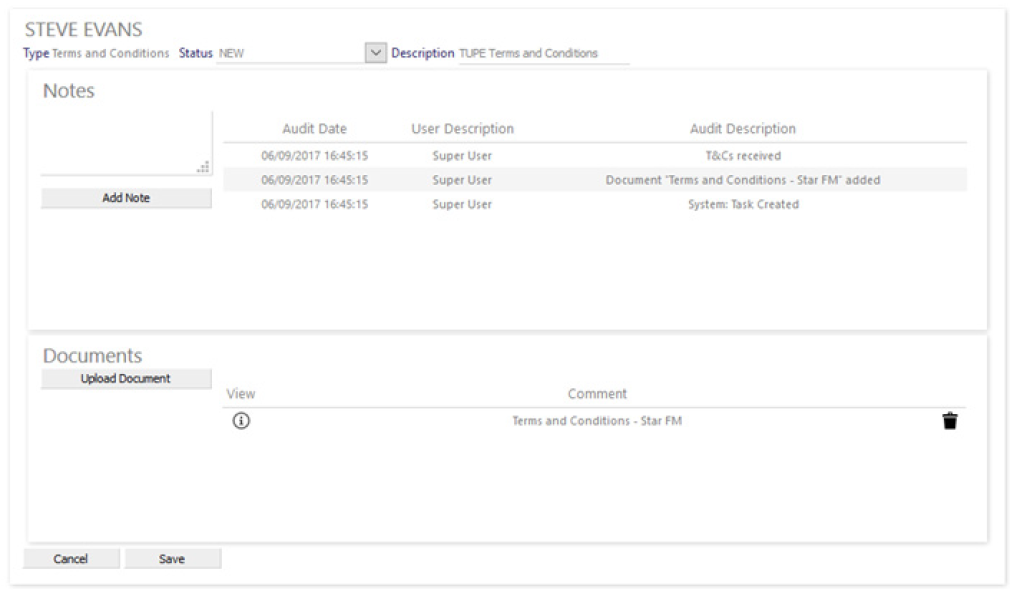
Screen Layout and Fields
| Type | Task Type shown for information only |
| Status |
A drop-down list is available which contains the available status for the Task Type. These are normally associated with the stages that the user would go through to process the tasks to their conclusion. see Admin | Engagement | Help Desk Task Status for more information |
| Description | A summary description of the task being created. This will be shown in the Task List section |
| Notes | A free format note can be added to the task. When Add Note is selected, the note will be shown in the Audit Section with a Date, Time and User stamp. Audit notes cannot be removed once added |
| Documents | Documents may be uploaded to the Task by selecting Upload Document. see the Upload Document section below. Documents can be viewed by selecting the information icon in the View Column and deleted by selecting the trash icon |
| Cancel | Select to cancel the task |
| Save |
Select to save the task |