Setup: Employees - General
The following video reviews how to set up a new employee, focusing on the required information on the General tab.
How to get there: Set Up | Employees | General Tab
The General Tab is what the user first sees when selecting Set Up | Employees. It contains the most commonly accessed information regarding employees.
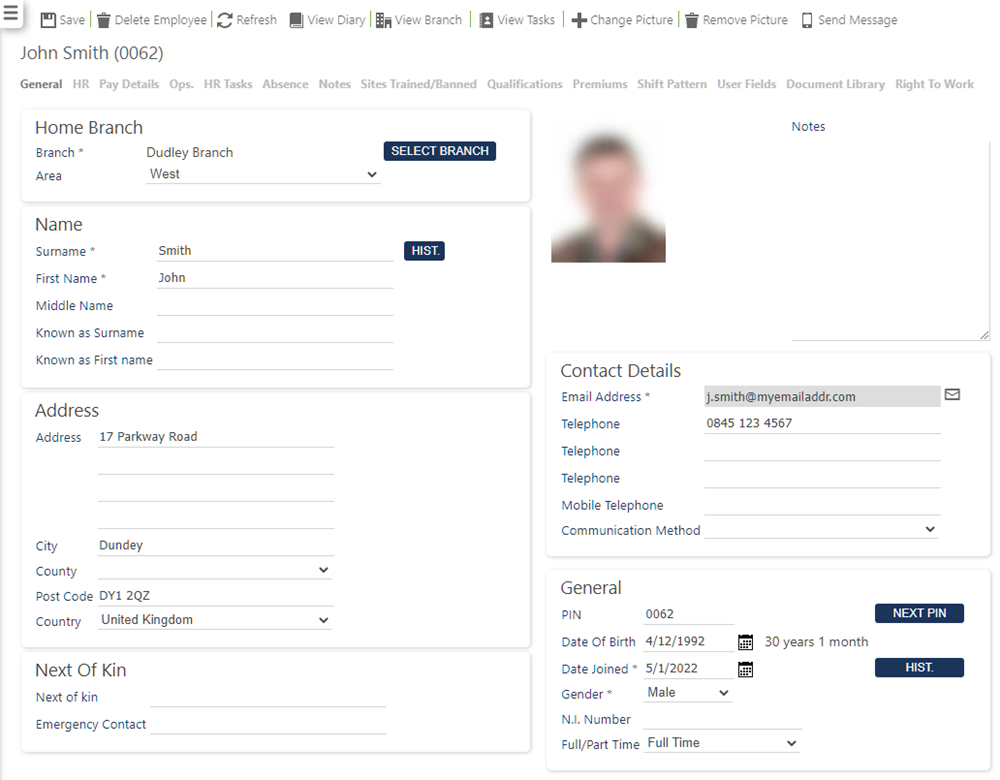
The screen is split into several sections that are all controlled by the system security functional role assigned to the user. These sections are detailed within this document.
Screen Actions
|
Save |
Save Employee changes |
|
Delete Employee |
Delete the Employee from the system. Note: If the Employee is a leaver, then do not Delete the Employee. Instead, set their Date Left on the HR Tab |
|
Refresh |
Revert to the unsaved state |
|
View Diary |
View Employee Monthly Diary screen |
|
View Branch |
View Branch information screen |
|
View Tasks |
View Employee Help Desk Tasks screen |
|
Change Picture |
Upload a new Photo of the Employee. Use either a PNG or JPEG format as these are smaller in size. This will improve performance when accessing the Employee General Tab across the Internet |
|
Remove Picture |
Remove the existing Photo of the Employee. A default Silhouette icon will be shown instead |
|
Send Message |
Will open a pop-up window and allow the user to select a message template to send to 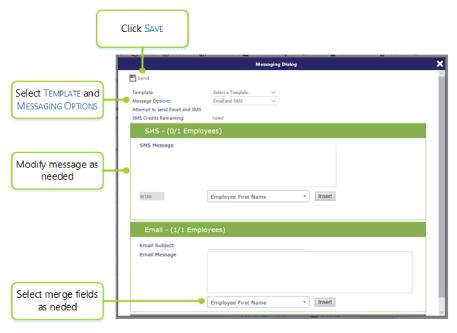
When completed, click Send to send the message. The message can be reviewed in Note: Send Message is only available within the Engagement Pack and SMS messages only where there is sufficient credit on the TEAM Software SMS account |
Home Branch
This section is used to allocate the Employee to the Branch and optionally the Area that they report into.
Screen Layout and Fields
|
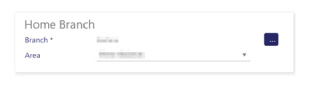
Branch (Mandatory) |
The meaning of a Branch will differ within each customer implementation of the system based on the ways in which a business is structured. It could be a division of the company, geographical location, type of business, operational area etc. To select a Branch, select the [...] of the Branch field. 
A pop-up window will appear to allow the user to search for a Branch or select the 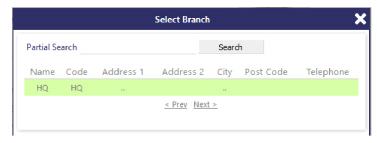
Click anywhere on the line to select it. The pop-up window will close and the selected Branch will appear in the General Tab. For more information on the setting up a Branch, see Set Up | Branches |
|
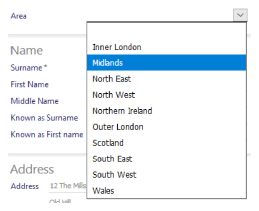
Area |
The use of the Area Maintenance will differ between system implementations but it could be used in replacement of the Employee Zone and Site Zone fields. To choose an Area, select an area from the drop-down list shown
The Area Name will be shown in the list. Click anywhere on the line to select. The Area selected will be shown on the screen. see Admin | General | General Maintenance | Area Maintenance for more information |
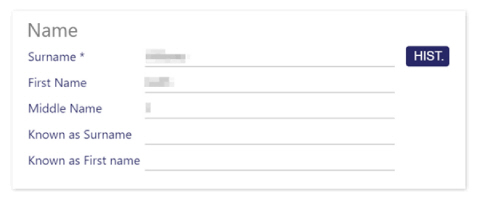
Name
This section will hold the Name information for the Employee. The First Name and Surname fields will be used on all selection screens so ensure that they are filled in correctly
Screen Layout and Fields
|
Surname |
Employees Surname or Agency/Contractor Company Name |
|
First Name |
Employees First Name |
|
Middle Name |
Employees Middle Name |
|
Known As Surname |
A different Surname that the Employee is known by |
|
Known As First Name |
A different First Name that the Employee is known by |
|
Hist. |
Select Hist to edit/view the Name History for the Employee and attach documents to support the changes (see next page of this guide for more information) |
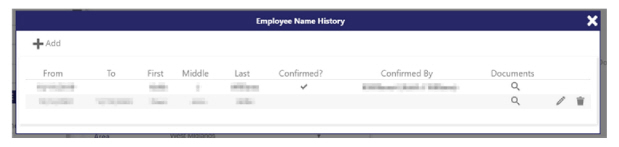
Name History
A pop-up History window is available by selecting Hist. This will allow the change of Name to be recorded. If a company is using Timegate Recruit, it will show an enhanced screen where documents can be attached. For those companies not using Timegate Recruit there is a simpler screen. The two screens and their functionality is detailed below.
Standard - Employee Name History
Screen Layout and Fields
|
From |
Date that the name was used from |
|
To |
Date that the name was used to |
|
First |
Forename of person |
|
Middle |
Middle Name of person that was used |
|
Last |
Surname that was used |
|
|
Select to delete a change of name record from the Employee Name History |
|
|
Select to edit the Employee Name History |
Timegate Recruit - Employee Name History
Screen Layout and Fields
|
From |
Date that the name was used from |
|
To |
Date that the name was used to |
|
First |
Forename of person |
|
Middle |
Middle Name of person that was used |
|
Last |
Surname that was used |
|
Confirmed? |
Automatically generated confirmation of the name change when a user confirms the name. This is done by selecting Confirm within the Employee Name History Maintenance pop-up window |
|
Confirmed By |
System recorded name of user that confirmed the name change |
|
Documents |
Select to view any supporting documents (expands the screen as shown: 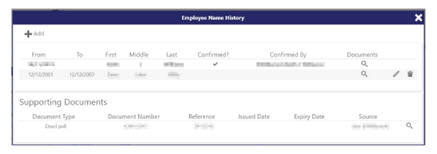
Select the next to the Supporting Document to view the document |
|
+ Add |
Select to add details of a different name. When selected, the following dialog box is opened: 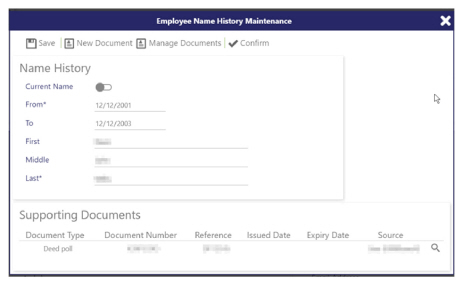
Enter the dates of the Name History (the From date is a mandatory value) Enter the new name details (First, Middle and Last name - Last name is mandatory) Select Current Name if this is the individuals’ current name. To add an existing supporting document, select Manage Documents and select the documents from there to support the name change To add a new document to support the name change, select New Document and follow the instructions To Confirm that the name change is valid, select Confirm Select Save to save changes. |
|
|
Select to delete a change of name record from the Employee Name History |
|
|
Select to edit the Employee Name History |
Address
This section will hold the address for the Employee.
Screen Layout and Fields
|
Address Search |
If enabled, start to enter a Post code to find the associated address (requires separate licensing) |
|
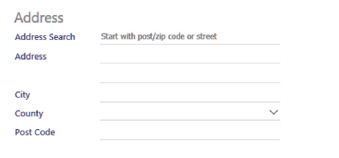
Address |
First 2 lines of the Employees Address |
|
City |
Address City |
|
County |
To choose a County, select it from the drop-down list: 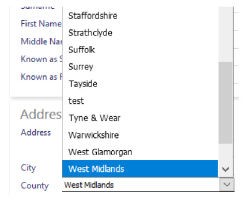
Click anywhere on the line of the desired County to select. The County selected will be shown on the screen. see Admin | General | General Maintenance | County for more information |
|
Post Code |
The Post Code for the Address. The label of this field may change dependent on geography for example it may be labelled as Zip Code |
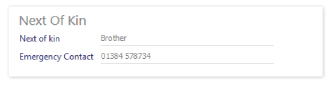
Next Of Kin
This section will hold the Next of Kin contact information for the Employee.
Screen Layout and Fields
|
Next Of Kin |
Name of the Employees Next Of Kin |
|
Emergency Contact |
The Next of Kin Contact Number |
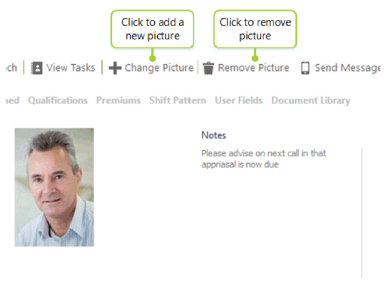
Picture and Notes
This section is used to show a picture of the Employee in case of identification check plus any quick notes about the Employee.
Screen Layout and Fields
|
Photo |
Current photo for the Employee |
|
Notes |
General Notes for the Employee |
Screen Actions
|
Change Picture |
Upload a new Photo of the Employee. Use either a PNG or JPEG format as these are smaller in size. This will improve performance when accessing the Employee General Tab across the Internet |
|
Remove Picture |
Remove the existing Photo of the Employee. A default Silhouette icon will be shown instead |
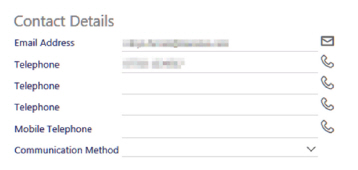
Contact Details
This section will hold the contact information for the Employee.
Screen Layout and Fields
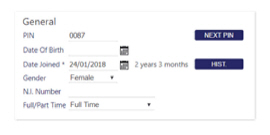
General
This section will contain all of the other key information when accessing the Employee.
All other information is contained in the remaining tabs.
Screen Layout and Fields
|
PIN |
Personal Identification Number (PIN) to allow the Employee to perform Clock-In.com T&A. A Next PIN button is available to generate the next available unused PIN number using the System Settings Starting PIN as a basis. This and the PIN length are defined within Admin | System | Scheduling SIN/PIN Section |
|
Date Of Birth |
Employees Date of Birth is also used when applying a Minimum Wage Scheme Uplift across the system if the Scheme has age banding. A date selector is available |
|
Date Joined* |
Date that the Employee started to work for the Company. The employee’s Continuous Service Date (known also as Date Transferred) is available on the HT Tab once the Employee is saved. A date selector is available |
|
Gender |
Employees gender |
|
PPS/NI Number |
The National Insurance Number for the Employee. Dependent on the system Implementation and geography, this label may be changed to PPS, Social Security Number, etc. |
|
Employment Type/Worker Classification |
Defines whether the Employee is a Casual, Part Time or Full Time worker. Many clients prefer to use the Employee Type field on the Ops Tab instead as the available options are user defined. |
|
Hist Button |
Will show a pop-up window of the Employment History |
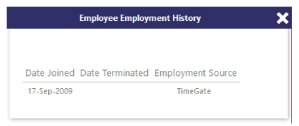
Employment History
This is a system maintained list of where the Employee has Joined and Left the Company, and subsequently
re-employed.
|
Date Joined |
Date Employee Joined the Company.A date selector is available |
|
Date Terminated |
Date Employee Left the Company. When an employee leaves the company, this should be selected, rather than their record deleted. A date selector is available. If you enter a value into this field and then select save, the employees data is checked to ensure that they do not belong to a future transaction, or does belongs to a future locked or closed transaction. If they have no future transactions that are locked/closed, you will receive the message that advises that the Employee Termination Date has been set. It also tells you that the employee will be removed from all duties, diary events, and contracts after the event If they have transactions that are locked/closed, a slightly different message is displayed on screen. You are advised that the Employee Termination Date has been set. It also tells you that the employee will be removed from all duties, diary events, and contracts after the event. Additionally, it tells you that the "Employee could be in a locked or closed period that they will be removed from after this date" The second message is a great way of making you aware that those shifts or diary events that were contributing to a transaction within a locked/closed period will be impacted by the termination. If you have any outstanding monies or diary events that need to be logged in a previous transactions make sure that it can be done before the termination. This will help you to ensure that that they are picked up in the following period lock/close, rather than being removed completely. These messages can be tweaked to meet with your business requirements. contact TEAM Software for more information |
|
Employment Source |
Where the Employee was added |